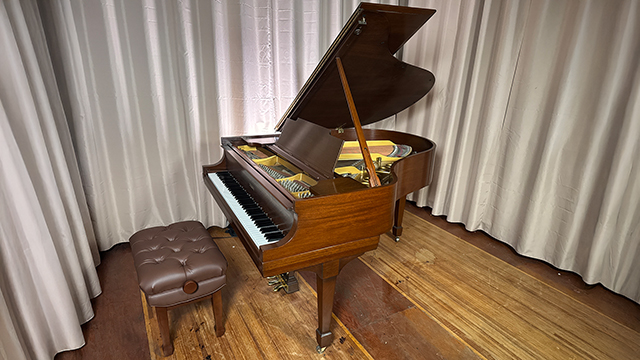
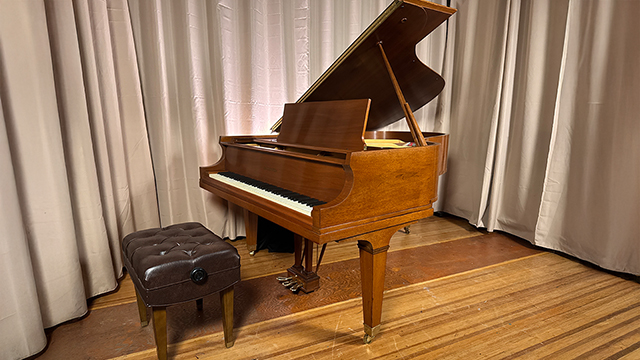
If you’ve taken piano lessons and listened to your teacher, they undoubtedly told you to play with rounded fingers – having your hand shaped like you’re holding a ball. If this is true, then why did one of the greatest pianists of all time play with flat fingers? Did Vladimir Horowitz play with flat fingers? The answer is yes; there is some truth to this!
Difference Between Round Fingers and Flat Fingers
You may wonder why you’re supposed to play the piano with rounded fingers? It’s very simple: if you play with your fingers outstretched you don’t get the benefit of using all of your finger joints. First of all, some fingers are longer than others. So thumbs and pinkies don’t reach all the keys! When rounding the fingers, they all form a straight line so your fingers are all over keys. Also, when playing fast passage work, it is necessary to play with curved fingers in order to play with speed. However, in slow passages, you’ll see Horowitz and other pianists such as Glenn Gould sometimes playing with flat fingers. This technique can allow for different tonal gradations which are difficult to achieve with rounded fingers. On the accompanying video, you will hear two versions of the beginning of Chopin’s Prelude in E minor, one with rounded fingers and the other playing with outstretched fingers.
Can You Hear the Difference?
I’m interested in your impressions of this demonstration. Do you see the value of playing with rounded fingers for fast passage work? And do you hear a difference in the tone playing with flat fingers? How many of you have tried this technique? We would be very interested in your thoughts about this. Again, this is Robert Estrin at LivingPianos.com Your Online Piano Store 949-244-3729 info@LivingPianos.com
A lot of people wonder if you can begin studying the piano as an adult. I often hear from people who have just retired and finally have the time, if they can begin studying the piano at their age. There are also people who never practiced when they were younger and wonder if it’s too late to take up the piano again. The simple answer is:
It’s never too late to begin learning the piano!
It’s important to have your expectations in alignment with reality. There are certain things you must be aware of. I’ve seen an incredibly wide range of results in piano progress among various people. Some have made remarkable progress at the piano in a short amount of time as adult beginners. How can this be? Your exposure to music in general is going to have a great deal to do with your success at the piano.
For example, if you’ve played an instrument like the clarinet, you are used to reading at least one staff of music as well as playing music. You’ve also developed finger dexterity. A transition to piano is going to be a lot more seamless than for someone who has never even listened to music let alone played a musical instrument. That person is going to have a harder time assimilating musical language.
A lot of affinity for music develops just from listening to it. So even if you’ve never played anything, but you’ve been an avid listener of music; you’re going to progress faster than someone who has avoided music their whole lives.
There is a parallel to how exposure to a foreign language can make it much easier to learn a second language.
There are a lot of things that enter into your success with studying the piano at any age. For example, there are different programs like Scott Houston’s Piano in a Flash. He was recently on our show and demonstrated how he helps people to enjoy the piano with his innovative chord system. His program isn’t designed to be able to play classical compositions of Beethoven or Mozart, but it offers fun for people wanting to play popular songs they are familiar with. His method of playing chords with the left hand and the melody line in the right-hand makes delving into the piano an enjoyable, casual endeavor. His program also offers ear training and guides you with improvisational skills. This is a way that a lot of people can get enjoyment out of the piano without striving to be a concert level player. For those of you wanting to play classical compositions, I suggest getting a teacher and studying the piano more formally because it’s more difficult to learn classical music on your own. Having a good teacher can help to guide your practice.
So, anyone can learn to play the piano at any age!
Enjoying the piano is what is most important. I don’t care who you are or what level you’re at, there is always going to be someone who is at a higher level and can do things you can’t do. This is for every single pianist in the world! So don’t worry. You don’t have to achieve any particular milestone. The point is to enjoy the process just like anything else in life. It’s about the journey, isn’t it? Thanks for the great question and I hope you have enjoyed this! This is Robert Estrin at LivingPianos.com info@LivingPianos.com949-244-3729
Recording the piano is a very deep subject. Today I’m going to give you an overview of what the process is about. I might offer a video course on this subject in the future because there is so much involved in recording the piano.
A piano is a kaleidoscope of sound.
There are so many different sounds you can get out of a piano. One aspect of the piano is that sound comes out of many different parts of the instrument. You have to decide what sound you are after when recording. There are so many different possibilities and questions regarding how to record a piano!
Microphones hear differently from human ears.
First, there’s the reality of recording versus hearing things with your ears. There’s a fundamental difference. To demonstrate this, say you’re at a party where there are a lot of people around. You can focus in on different conversations around the room. But if you were to take an excellent pair of microphones and try recording a room full of people talking, listening back even through top of the line studio monitors or headphones would not enable you to zero in on different conversations. You would just have a jumble of talking. The best you could hope for his being able to follow the conversation of the people closest to the microphones. You might wonder why this is. First of all, how you can direct your attention to different sounds in a room is a fascinating subject in itself.
Your brain deciphers what you hear.
In motion pictures, or in complex musical recordings, there are recording techniques to enable you to hear many separate elements. Techniques such as panning left and right, and equalizing different bass or treble frequencies can make it possible for you to hear many distinct sounds or conversations in recordings.
Your brain is an amazing machine and it can accomplish this by utilizing the folds in your ears to decipher early and later reflections of sound. It’s able to identify minute differences in distance and frequencies to help you discern the directionality of sound thereby differentiating what you are hearing. That’s why even blindfolded without moving at all, you can tell if a sound is coming from in front of or behind you even if the balance of the volumes are exactly the same!
There are countless variations in sound in recordings.
I bring up all of these aspects of psychoacoustics so you can begin to understand the challenges of recording the piano. If you want to get a more intimate sound, you place the microphones closer to the piano. It will give you a somewhat compressed quality when microphones are placed inside a piano. You can sometimes achieve a warm quality of sound by doing this. However, as you play louder, you can hear more percussiveness with close miking techniques.
Half the sound of a piano comes out from the bottom.
If you want a more balanced sound, try placing the microphones further away from the piano. It’s a compromise between detail of sound versus balance.
There is an art to recording the piano.
What are the challenges of using multiple microphones? Once you have more than one microphone that isn’t physically next to others, you add a level of complexity with such things as phase cancelation. This is when the sound reaches different microphones at different times. Some frequencies will cancel themselves out while others will amplify themselves since sound is comprised of waves. If the sound waves from one microphone are at the opposite end of the wave cycle, the sound cancels out just like in noise canceling headphones There are time alignment technologies that can solve this problem, but it gets complicated, very quickly.
Here’s a tip for you. I suggest when you’re recording, try standing in the room and listen to what it sounds like at different places in the room. Then, place a microphone or a pair of mics next to each other at that point. For example, you might find a pleasing sound at the tail of the piano. Listen to the results of your recording. Then try recording with a different microphone placement and compare the sounds. You might discover a sweet spot where the sound is very pleasing. Ideally, you get someone else to play the piano while you listen on headphones or speakers in another room.
Experimenting with microphone placement.
Better than that, get a pair of mics that you can mount on a stand with headphones and long cables. Have somebody play the piano while you are listening and moving the microphones around the room. There are all sorts of microphone techniques that you can discover. It’s one of the best ways to determine the kind of sound you’re getting out of your piano when you record it. It’s not a right or wrong proposition. There are many different types of sounds you can get depending upon what you’re looking for. Generally, recording closer to the piano will give you a more intimate sound with more action noise. Further miking will give you a more balanced sound. Room acoustics are also an important consideration. Ambient noise may preclude distant miking of your piano. You may have never noticed your ventilation system before. Yet, when listening back to your recording, anything from cars outside to your refrigerator may destroy an otherwise wonderful recording.
My experience in the recording studio.
I grew up with hand me down recording equipment from my father that I loved to play with as a kid! Later, he would let me work with his professional recording equipment. Better than that, I got to attend my father’s recording sessions from an early age and learned a tremendous amount from them. These historic recordings are available now on CD and are on the highest level of the art of recording.
I hope you’ve enjoyed this brief tutorial and thanks for joining me, Robert Estrin here at LivingPianos.com, Your Online Piano Store info@LivingPianos.com 949-244-3729
Piano appraisals are not what you might think. Many people seek out appraisals to determine selling prices for instruments, but this is not the purpose of piano appraisals. A piano appraisal is a legal document drawn up by an expert in the field which assigns value to an instrument, often for the purposes of insurance protection or estate settlements. In cases of tax fraud, an appraiser is held legally liable, since an appraisal is a legal document. Although this value is well researched and legally binding, it has little to no bearing on the potential selling price of an instrument.
Selling a Piano is Not Like Selling a Car or House
Selling a piano can be a bit overwhelming at first, so naturally one compares the process to selling other large items, such as cars or houses. There are some key differences in the valuation of pianos. When selling a house, you can access the selling history for a property, and coupled with current market values, this will give a fairly accurate idea of a reasonable sale price. In the case of automobiles, there are reliable valuations available from Kelley Blue Book and Edmunds which provide a general idea of sale prices. When it comes to pianos, there are several factors that affect a potential sale price. The age varies greatly in pianos, from being brand new, to pianos that are over 100 years old. This will affect the sale price. Condition and brand play an even bigger role.
Why You Can’t Use Appraisals to Determine Selling Prices of Pianos
As we discussed earlier, an appraisal is a legal document that assigns value to an instrument, often for the purposes of insurance claims or an estate settlements. However, this value does not necessarily reflect the current market value. There are countless piano brands out there, many that no longer produce instruments. So, the replacement value can be difficult to determine. Also, the type of sale will often affect the sale price. For instance, the price for a piano in a store, where instruments are tuned and regulated will differ greatly from the price on Craigslist, and consignments will vary as well. If you are curious, go to eBay and compare the asking prices for pianos with the prices of pianos that have already sold, and you will find the values are often drastically different.
Your Selling Price is Up to You!
When it comes down to it, all these factors will affect how much you can sell your piano for, but ultimately the selling price is whatever someone is willing to pay for your instrument. Generally, the more work you are willing to put into the sale, the more money you can get for the instrument. For example, if you have the piano put into top shape, take high resolution pictures, post online on several websites, show the piano whenever someone wants to see the piano, offer to help arrange the move, and are patient, you may get top dollar for your piano. On the other hand, if you just want to list on Craigslist and sell fast, or sell the piano wholesale to a piano dealer, you will get far less for your piano.
Piano appraisals are important legal documents. For example, if you lost your piano in a fire and you had to replace it quickly going to the nearest piano store and finding a similar replacement, you might pay appraised value. That’s the whole purpose. You shouldn’t be put out in that kind of situation. You also want an equitable solution in an estate settlement that everyone can agree upon. These are where appraisals have great value. But they really doesn’t have much to do with what you can sell your piano for.
This is Robert Estrin at LivingPianos.com Your Online Piano Store. 949-244-3729 info@LivingPianos.com
In this video, Robert talks about and demonstrates the capabilities of a Chickering 105D art-case concert grand piano built in 1906. This piano has been completely rebuilt including a new soundboard scaled after the original. This piano is a powerhouse of sound with a magnificent bass register that has depth as well as projection. This piano was produced in a bygone era and was extremely well cared for throughout the ages.
This Chickering was built at a time when there were almost 2,000 companies producing pianos in the United States!
From the very beginning, it was one of the finest quality pianos that money could buy. Sadly, many vintage pianos are not structurally sound enough to make them worth restoring. However, a piano like this rarely comes along which has benefitted from a gentle life and makes an excellent candidate for rebuilding. The original real ivory keys are a testament to the care this piano has had over the years. The end product of careful restoration can result in a piano of substantial musical quality when the work is done on the highest level as in this piano.
You can experience a sound and look of one of the best American pianos of all time.
Today, the epicenter of piano manufacturing is China. While the quality of these instruments keeps improving, the vast majority of them are not on the level of the few remaining American and European pianos being made today. More than that, the quality of craftsmanship and the woods available 100 years ago made instruments like this possible. So, the answer to the question is a resounding, “Yes”, when everything is aligned properly with the original manufacturing, life of the instrument, as well as restoration work, a 113 year old piano can sound glorious!
Did you know that if you go to music conservatory or major in music at a university, you have to have a certain level of piano proficiency in order to get your degree?
All Music Majors Have to Play the Piano
Let’s start from the beginning. There are two essential instruments for all musicians. The piano is one and the voice is the other. They are diametrically opposed to one another. One is the most natural instrument we all carry with us. You must hear something in your head before you can even produce the sound. The piano is the opposite, when you push a key it makes the sound even if you don’t hear it first.
The Piano Can Play Complete Music
Most instruments can only play one note at a time. So, in order to play complete compositions, you usually have to play in an ensemble. What’s unique about the piano is that you can play complex, polyphonic music all by yourself! You can play chords and harmony. More than that, it’s visual. The piano is laid out in such a way that you can see what diatonic harmony is all about. That is, the half-step/whole-steps arrangement which is readily apparent on the keyboard. Chords are easy to negotiate as well. Even a child can do it. It’s that easy!
There’s More to Piano Than Just Visualizing Your Music
If you play the clarinet, saxophone or flute; the vast majority of music is written to play with other musicians. In fact, most solo music for other instruments contain substantial piano parts. Piano has more repertoire than all other instruments combined. Piano is a tremendous second instrument because you can realize the other parts to the pieces you’re playing. You might wonder what the orchestra is doing in a concerto you are playing. There will be an orchestral arrangement on our score you can play on the piano so you can hear it!
All People Should Study the Piano
The piano is intrinsic to music. You’ll learn theory and understand chord structure. It makes an excellent tool for ear training as well. It’s visually in front of you and you can produce sounds and harmonies that are impossible to create by yourself on most other instruments. I had the good fortune of starting the piano at a very young age. Later, when I was in 4th grade, I start playing the French horn in school. I could already read music fluently and was playing somewhat sophisticated music (for a relative beginner) on the piano. It was easy for me to grasp the horn initially because I was used to much more complex music on the piano. It made me take to the French horn quickly because I was used to the complexity of reading two staves on a score. Reading music for the French Horn was easy by comparison (even though there are many challenges playing a wind instrument).
So I recommend that if you don’t already play the piano to go for it! It will enlighten you about music structure and help you with your primary instrument. You’ll get to explore a lot of music and it will be fun! You have so much to gain! Thanks for joining me, Robert Estrin at LivingPianos.com Your Online Piano Store 949-244-3729 info@LivingPianos.com