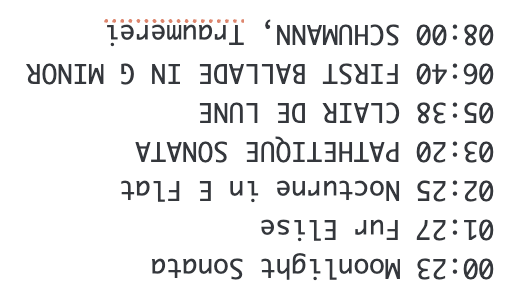
Welcome to LivingPianos.com. I’m Robert Estrin. Today I have something a little different and a lot of fun for you. In this video, I put your ears to the test with a musical guessing game. I play short excerpts from some of the most famous classical piano works ever written, and your challenge is to identify each piece as quickly as possible. Some may be instantly recognizable from just a handful of notes, while others might take a few more seconds before everything clicks into place.
This is more than just a trivia game. It is a wonderful way to sharpen your listening skills and discover how deeply these great works are etched into your musical memory. You might surprise yourself by recognizing a piece from its harmony, rhythm, or even just its texture before the main theme appears. See how many you can name within ten seconds, keep score if you like, and share your results in the comments. I would love to hear which ones you knew right away and which ones kept you guessing.
Let us know how you did on this listening test!
Leave comments about pieces you would like full tutorials on.
How to Play Trills on the Piano – Piano Lessons with Robert Estrin
I’ve had quite a few people recently asking me for tips on how to play trills on the piano. It’s no easy task – or is it? This video and article will provide a few tips and techniques you can use to help master trills. The first thing to do is make sure you play your trills with minimal arm weight. If you’ve watched some of my other technique videos you know that I emphasize arm weight as a very big component in tone production – especially when it comes to slower melodies. The challenge with trills is playing lightly, almost floating your hand above the keys to allow the notes to flow with minimal effort. The next thing in playing trills is keeping your fingers very close to the keys. Trills are played so fast that there is not a lot of time for movement, so it’s best to keep your fingers very close to the keys – so close you remain in contact with the keys! Another thing is to make sure your fingers are rounded. It’s nearly impossible to play fast with outstretched fingers; keeping them rounded will help improve speed dramatically allowing more than just one joint to execute the trill. These are some of the most important aspects when it comes to hand position. However, there is something fundamental about approaching trills. Even if it sounds like just a bunch of notes, you need to figure out exactly how many notes you are playing as if it’s written out. Learn trills like you would learn any other fast passage in your music working with the metronome increasing one notch at a time as you gain confidence. Another big question is how to know how many notes to play in a trill. One valuable technique that I use frequently is to play just one note of the trill. For example, if you are playing a trill and starting on the upper note, just play that upper note. You will get an idea of how fast you can play the trill by only playing one note of the trill first, either the top note or the bottom note – whichever one you are starting the trill on. This brings up an important subject in trills, what note does it start on? This could really be a subject for an entirely separate video but I am going to provide some basic information here. As trills are written, you will usually start on the auxiliary (the note above the written note of the trill; the next note in the scale of that key). For example, if you have a piece in C major and you have a D trill, you would start on E. Can you start a trill on the note written? For example, if it’s written as a D can you start on a D and move up to E? Yes; it depends on the context. There are different schools of thought on this but generally, I would say a trill is basically a long appoggiatura (a non-chord tone resolving into the harmony). So starting on the auxiliary generally makes musical sense. However, in different period styles and in shorter trills, use your judgment as to what sounds best and what you can execute with confidence. The last thing I want to address with trills is one of the biggest challenges; how to end them! If you don’t know exactly where you are it can be difficult to end them smoothly. The good news is there is a great practice technique for this. I always like to play the trill right up to the point before it ends, and then stop in a relaxed manner over the keys. Keep doing that until you have a good grasp on where you will be right before the last notes of the trill. Keep playing that passage over and over and eventually add the last notes of the trill. But don’t play them right away; pause in a relaxed manner before you play the last notes. At first, make the pause as long as you need it; eventually, make the duration of the pause smaller and smaller; until the pause is imperceptible to the listener but guides the ending of the trill for you!
What’s the Difference Between a Mordent and a Trill?
Mordents and trills look so similar on the page. You usually find these in Baroque era music of Handel, Bach, Scarlatti and other composers from that time. I want to show you one specific difference that’s very important. The beginning of the Sarabande movement of the 5th French Suite of Bach starts with a mordent. You can hear me play it without the mordent on the accompanying video first. Shortly after, there is a trill so you can discern the difference. You will hear it played first with no ornamentation. Mordents and trills differ from each other in two interesting ways. Bach wrote a mordent on the first note in the right hand which is a “B”. The secret to a mordent is you add the note below and then go back to the note that’s written so when you have a B you’re going to play B-A-B. So what’s different about trills? Right after that, you have a trill. Trills start on the upper note. Typically trills can have more than one or two notes and this is for freedom of expression. In fact, the whole Baroque era is noted by its ornamentation. And it isn’t just music. Take a look at the architecture and the art of that period. It’s noted for the filigree and all the beautiful fine detail. Ornamentation is an opportunity for the performer to add their own expressive element. That’s why if you listen to different performances of the same exact pieces of Bach, Handel, Telemann, and other Baroque composers, the ornamentation can be quite different. You can listen to how it sounds with the ornamentation. You have to watch the squiggly lines: the mordant has often has one less than trills and have a vertical line.
The Periods of Classical Music Part 1: Baroque Era
The Baroque era pretty much extends from around 1600 to the mid-1700s. What distinguishes this era of music from others? Baroque music, much like the art and architecture of the time, is very ornate. There are a lot of different textures and the music is very linear. The music often has several lines of music that intertwine. One of the paramount musical forms is the fugue – which has a subject and counter-subject that develop in an intricate fashion. It’s very important in Baroque music to not favor the top line of music as is typical in other periods of music. Baroque music is much more like a tapestry of sound – it should all blend together well. I perform an example of this in the video above with the fifth French Suite of Bach. Notice how even though there is a melody, I allow the other parts to have equal say. The other thing that is a vital component in Baroque music is keeping a steady beat. There is little give and take as in other period styles of music; you should be very clear and be able to hear the lines and allow the counterpoint to come through. You should also employ a minimal amount of pedal when it comes to the piano. When you are playing with other instruments, articulation is vital to getting a clear sound and style. Another thing to keep in mind with Baroque music is the ornamentation involved. You might notice a bunch of ornamentation markings sprinkled around Baroque scores and there are countless ways to interpret these. Ornamentation includes things like trills, mordants, turns and other techniques that are used to embellish your music beyond what’s written on the page.
What Are The BEST Trill Fingers?
I’ve talked before about how trills must be measured. You have to know exactly how many notes you’re playing in a trill. Even though when you listen to a trill it sounds like a free form explosion of notes going back and forth, trills have to be measured so you know exactly how many notes you play. Otherwise, ending a trill is impossible because you’re leaving it to chance whether you end up on the right note or not! You don’t always get to choose your trill fingers. There are some instances, for example in Bach Fugues, where you must trill with four and five. These are the worst fingers to trill with! Try to avoid four and five as trill fingers. A lot of people think three and two are the best trill fingers. And indeed, three and two are pretty strong trill fingers. But the best trill fingers are actually three and one! Three and one are the strongest fingers. Your thumb is the strongest finger and the third finger is probably your second strongest finger. Three and one are terrific for trills. Four and two could work nicely as well. There are a lot of different possibilities. Three and one are great when you have that possibility. Three and two are good too. It depends where you’re coming from and where you’re going in your score to determine what the right fingering is. Not only that but if you have other lines within the same hand, sometimes as I said, in contrapuntal writing in fugues particularly, you might not have much of a choice as to which fingers to use for trills. I’m going to give you one final trill fingering tip.
I’m going to show you something that’s really interesting and it ties right in with the idea of measuring your trills. If you measure your trills, you might want to try alternating three, one, three, two. By using those fingers, you actually reduce the load of the trill to three fingers so none of the fingers have to work quite as hard. Not only that but it helps you to measure your trills. Even if you don’t end up using three, one, three, two as trill fingerings, it will help you to make sure that you’re playing the right number of notes in your trills, which is the most important thing! You never want to think of trills as something abstract from music. Just imagine that every single note is written out and play it as it’s written in the score. If you’re figuring out your own trills, find something you can play reliably. Don’t worry about trying to make the fastest trill. What’s important is that it’s musical, repeatable, and dependable. If you can use three and one, or at least three and two, you’re going to be way ahead of the game.
Brilliant Piano Finger Technique – Piano Lessons
When I was growing up, I would listen to some of the great pianists such as Horowitz and Rubinstein. I would also listen to some of the pianists from the early 20th century such as Hoffman, Rachmaninoff, and Joseph Levine. I was always so impressed with the pristine finger work. It almost would sound like a string of jewels because of the evenness of the notes, and I always wondered how to achieve that sound. So today’s show is about how to achieve brilliant finger work. I’m going to regress a little bit more. When I first started studying the piano with my father Morton Estrin, he showed me how to practice scales with raised fingers and often times my students ask me, “Why do I have to raise my fingers?” Let me show you what I’m talking about. With slow scale practice, it’s important for strength to raise the fingers. You may wonder why you would ever want to play that way because obviously when you play quickly, you don’t have time to raise your fingers. The secret to getting the evenness in your scale work and fast finger passages is the release of notes. For example, if you were to put your hand on a flat surface and just try to lift one finger, some of them are pretty hard to lift. Lift your fourth finger with your hands on a flat surface, and it’s very hard. It’s actually the release of notes that takes more strength than the pushing down of notes! So to strengthen and then to release is the reason for practicing slowly with raised fingers so you’ll practice the release of each note and that will lead to the pristine beauty you can get in fast finger work. That is one of the secrets for achieving beautiful clarity in your playing. There are many others that I will discuss in future videos in terms of hand position and other practicing techniques. For now, I suggest that you practice very strongly. Practice your scales and your arpeggios slowly with raised fingers then work up gradually faster. As you get faster, your fingers, by necessity, must be closer and closer to the keys until you can play quickly but still have the pristine evenness, so each note is exactly the same length because the raising of fingers accomplishes the release of each previous note.
Welcome to LivingPianos.com. I’m Robert Estrin. You might have clicked on this thinking, is this just clickbait? I assure you, it is not. What I am about to share with you is very real, and if you embrace it, it can transform your piano playing in ways you might not believe, all in just ten minutes a day.
Why Ten Minutes Can Make Such a Difference
How can ten minutes possibly change your playing? It sounds almost impossible. There are plenty of piano teachers who have students grind away at endless exercises, studies, and technical drills. I actually take a very different approach. I believe the most important thing to work on at the piano is repertoire. There is so much great piano music that already addresses technical challenges that most standalone exercises are unnecessary.
The One Big Exception
Here is the exception, and this is the key to everything. Scales and arpeggios. You have all seen books like Hanon, The Virtuoso Pianist. You might wonder who can possibly sit down and just rip through all of that. The truth is, you should be able to play all your scales and arpeggios under control. Maybe not at lightning speed at first, but comfortably and securely. The idea of spending hours on this sounds daunting. Here is the secret. You only need five to ten minutes a day.
One Scale a Week Is Enough
Take just one scale per week. That’s it. I am not a fan of endless technical work, but this is the one thing you absolutely need if you want to take your piano playing to the next level. Start with the C major scale. You will notice it is written in four octaves in Hanon. That is intentional. You need to be comfortable playing across the entire keyboard. Piano music does not live only in the middle. It uses the full range, so you must be at ease everywhere on the instrument.
Proper Seating and Position
Before you even play a note, make sure you are seated correctly. Sit far enough away from the keyboard so you are not cramped. If you are too close, you cannot reach the high and low ends comfortably, and your arm angles will be all wrong. Make sure you are centered. Keep in mind, the center of the piano is not middle C. It is closer to the name on the fallboard. Sit there so you can easily reach both extremes of the keyboard.
The Mystery of Scale Fingerings Simplified
When you look at scale fingerings, it can feel overwhelming. The good news is there are really only eight fingerings you need to learn. Once you learn them, you can apply them to many different scales. Even better, once you learn the C major scale, there are many other scales that use exactly the same fingering. This is why slow, careful practice is where all the value lies.
Slow Practice With a Metronome
Start with your metronome set to 60 and play one note per beat. Slow practice builds strength, control, and independence of the fingers. High, raised fingers help develop this control, and I have many videos that go deeper into this topic. Here, I am giving you the condensed version so you can get started right away. In just a year, doing one scale or arpeggio per week, you can learn all your major scales, minor scales, harmonic and melodic minors, and arpeggios. That is about 60 total. This slow work is like stretching for an athlete or dancer. It wakes everything up and builds clarity, so you know exactly which keys are down and which are up.
How to Play the Scale Correctly
As you play, keep your shoulders relaxed. Avoid any up and down motion of the arms. This is finger work. The thumb tucks under smoothly, staying close to the keys so it is ready for the next note in the right hand going up and the left hand coming down. Memorize where the thumb crossings happen. Once you do, everything feels natural. This kind of practice feels good because you really get to dig into the keys, with rounded fingers and unused fingers lifted and relaxed.
Building Speed the Right Way
After playing one note to the beat, move to two notes per beat. Go all the way up and down several times. Then move to four notes per beat. At this point, lighten up and stay close to the keys. Listen carefully for evenness. Make sure each note is articulated cleanly and that notes do not overlap unevenly. This listening is just as important as the physical motion.
When and How to Use This Practice
You can do this as a warm-up, or you can do it when your mind is tired of learning repertoire. Five to ten minutes a day is all it takes, and the results are profound. Do exactly the same thing with arpeggios. Remember, this technique comes from the fingers, not the arms. You cannot play fast or accurately by flailing your arms. Fingers are the key.
Why This Works
About 90 percent of piano music is made up of scales, arpeggios, and broken chords. This work not only gives you technique, but also a deeper understanding of keys and harmonic relationships. It ties together technique, theory, and musical understanding. All of this, in just ten minutes a day, can truly transform your piano playing. If you have questions, feel free to leave them in the comments on LivingPianos.com or on YouTube.
Scales and Arpeggios ULTIMATE Master Class Watch Video
Hanon: the Virtuoso Pianist Download
Today you are going to learn about the biggest piano practice mistakes you may not even realize you are making. Most pianists spend years practicing harder and harder and still do not get better. In almost every case, it comes down to one hidden mistake. Virtually all students make it, including intermediate and advanced players. If you have ever wondered why your playing seems stuck, this is likely the reason.
What Most Pianists Think Practice Is
Many pianists think practice means logging hours at the piano, playing pieces from beginning to end, and hoping consistency will come with time. Unfortunately, this kind of practice often reinforces problems instead of solving them. The biggest mistake is mindless repetition. Practicing by repeating rather than problem solving is the number one reason pianists fail to improve.
Why is this so damaging? Errors turn into habits. Awareness disappears. Tension creeps in. And enormous amounts of time are wasted. From a neuroscience standpoint, neural pathways do not know the difference between right and wrong. They only know what you repeat.
Why Starting at the Beginning Every Time Does Not Work
One of the hidden practice mistakes people often make is always starting from the beginning of a piece. It feels comfortable because it is the part you know best. You get the illusion of progress by playing what already sounds good. But this avoids confronting the weaknesses that give practice its value. The result is predictable. The beginning improves, the middle stays about the same, and the ending barely improves at all. You polish the opening until it is smooth, reach a difficult passage, and suddenly everything falls apart. Because it is not fun to play what sounds bad, you avoid the very sections you should be practicing. Your brain rewards familiarity, not progress. That is why this approach feels productive even when it is not.
The Fix: Practice Small Sections and Start Where It Is Hard
Instead of starting at the beginning, focus on what actually needs work. Sometimes that means starting from the hardest passage. If you have played the opening a hundred times and the rest is not improving, begin your practice right where the problems are and master even a tiny section completely.
Another Big Mistake: Practicing Too Fast
Practicing too fast is another major problem. If you cannot play a passage securely at a given tempo, practicing it fast only burns sloppiness and tension into your playing. It is tempting because it is exciting and you want to hear the piece at speed right now. But hoping it will magically clean itself up never works. Do not confuse tempo with mastery. Speed will come naturally once you have solidity and control. If you can play something slowly with security, you can gradually increase the tempo. Playing faster than you can play accurately destroys progress because you are reinforcing errors.
Why Bad Habits Are So Hard to Fix
Once tension and sloppy motions are ingrained, they become extremely difficult to eradicate. My wife Florence, who teaches flute, sees this all the time. Students trained from the beginning can develop a beautiful, relaxed sound. Students who come with years of tension often struggle to undo it. Your hands memorize motion patterns, correct or incorrect. That is why you must never allow sloppy, tense playing to become routine.
Slow Practice Works
If you play a passage too fast and think you can fix it by repeating it again and again, stop. Instead, take a very small section and practice it slowly and securely. At first, slow practice can feel harder because it exposes what you do not really know. But this is exactly what allows you to clean up imprecise finger patterns and achieve a beautiful sound.
Stop Avoiding Your Weaknesses
It’s easy to play through a piece while glossing over the parts that give you trouble. But avoiding weaknesses guarantees they will never improve. Isolating problem spots is uncomfortable, but it is essential if you want real progress. Many people have emotional resistance to this. Your ego would rather play the parts that sound good. But what really happens is your worst measures never improve, your tension builds, and the piece hits a progress wall.
Diagnose the Problem Before You Try to Fix It
To fix any problem, you must first diagnose it accurately. Often the first thing to check is fingering. Look carefully at what is written in your score. If the fingering does not work, explore alternatives. A great resource is IMSLP.org, which offers many editions of the same music with different fingerings. Sometimes a new fingering solves a problem instantly!
Another factor is motion. Practice just the leaps or just the difficult movements. Stop before the note you tend to miss and rehearse the motion itself. You can also use rhythmic practice to improve coordination. Coordination issues often come from the hands not being precisely together. Practice stopping just before both hands play to ensure exact alignment. Balance between the hands is another major issue. Do not be afraid to exaggerate the melody. Use arm weight to project a singing tone. You can always refine later, but first establish clarity and balance.
Always Put It Back in Context
After fixing a problem in isolation, always put it back into the musical context. Practice is not just about solving problems. It is about reintegrating them into the piece. Good practice is problem solving. Work on small sections. Analyze instead of rushing. Control instead of speed. Attack weaknesses directly. Even if you spend a lot of time on a very small amount of music, the benefits are enormous because solutions transfer to other sections.
A Simple 10 Minute Daily Practice Routine
For the first one or two minutes, warm up with something simple like scales. Keep shoulders relaxed, fingers rounded, and motions economical. Warm up thoughtfully, not mechanically.
For the next three to five minutes, identify one problem spot and isolate it. Solve it thoroughly, even if it feels difficult at first.
For the next few minutes, continue working on difficulties using slow practice or rhythmic variations.
In the final minute or two, reinforce your work with a clean, relaxed playthrough of just the section you fixed.
Practice With Intention, Not Just Repetition
Simply repeating a passage over and over does not guarantee improvement. Mindless repetition often reinforces mistakes. Practicing with intention means identifying the problem, isolating it, and working on it carefully until it is solved. Focus on one issue at a time rather than trying to fix everything at once. By practicing deliberately and thoughtfully, even small daily improvements will compound into dramatic progress.
What part of your pieces have you been avoiding? Leave a comment and I will help you diagnose it. I read your comments and take them seriously. I hope this helps you. Again, I am Robert Estrin. This is LivingPianos.com, Your Online Piano Resource.
Welcome to LivingPianos.com. I’m Robert Estrin. Today we’re going to explore some of the groundbreaking composers who revolutionized classical piano music. Now, this could easily be a ten-week course or span an entire semester. There are so many important figures, but I’ll focus on a few of the most influential composers who opened up vast new possibilities in piano composition.
From Baroque Restraint to Classical Clarity
Let’s start with Bach. Of course, the piano hadn’t even been invented during his lifetime. His music was primarily written for the harpsichord or clavichord and is highly contrapuntal, with voices weaving tightly together. The writing tends to stay within a narrow range without many large leaps.
Even moving forward to Mozart, whose works were written for the early piano, the textures remain relatively close-knit. Take, for example, his Sonata in C major, K. 545. If you listen to the second movement, you’ll notice how everything stays in a compact register. The hands move in a limited range, and the melodies and accompaniment are very much in the same sonic space. This kind of writing is also typical of Haydn, where the music is refined and structured, but still maintains a tight, elegant character without extravagant gestures.
Beethoven Breaks Boundaries
Naturally, the next step in the evolution of piano composition brings us to Beethoven. He truly expanded what the piano could express. I’ve covered Beethoven’s innovations in other videos, but I want to highlight just one example that showcases something you’d never find in Mozart’s writing.
In the first movement of the “Pathetique” Sonata, Beethoven uses crossed hands in a dramatic way. This isn’t just for show. It adds a layer of complexity and theatricality that was unprecedented. While Mozart might occasionally include brief hand crossings, like in the “Turkish March” Sonata, Beethoven takes it much further. He also introduced a much wider dynamic range, including sudden changes from soft to loud, and vice versa, which revolutionized expressive possibilities on the piano.
Chopin and the Romantic Voice of the Piano
Where do we go from Beethoven? Chopin, of course. Chopin and the piano are almost inseparable. His entire output centers on the instrument, and he introduced a rich variety of textures and techniques that hadn’t been explored before. Take a look at his Ballade in G minor. Let’s consider just a short excerpt. If you play it slowly, without the pedal, it almost doesn’t make sense. It’s a bit like viewing an Impressionist painting up close. You just see blotches of color. But from a distance, everything blends beautifully. Chopin was able to envision these flowing passages and understand how they would sound when played with proper pedal and tempo. The theme that emerges is so lyrical and expressive, yet surrounded by a tapestry of harmonies and textures. His writing pushed the instrument into new emotional and tonal territory.
Of course, Chopin wasn’t alone. We could talk about Liszt, who brought virtuosic brilliance to the forefront. Mendelssohn and Schumann also contributed greatly to the development of Romantic piano music. All of these composers expanded what the piano could do, both technically and expressively.
Into the 20th Century: Color and Complexity
Fast forward to the 20th century and everything changes again. With composers like Ravel, Debussy, and Prokofiev, all conventions are reimagined. For instance, Debussy’s Doctor Gradus ad Parnassum from his Children’s Corner suite showcases a completely different kind of writing. The textures and colors he creates on the piano are almost orchestral. Listen closely and you’ll hear a shimmering, impressionistic style that’s completely different from earlier composers. This continued exploration of timbre and sonority brought piano music into the modern era.
What Comes Next?
The progression of piano writing over time reveals a fascinating journey. Each of these composers built upon what came before, expanding the expressive and technical range of the instrument. We’re fortunate to have such a rich repertoire that showcases the piano’s full potential.
Which composers do you feel expanded the possibilities of the piano in revolutionary ways? Leave your thoughts in the comments. There are so many more we could explore. I could easily create a part two, three, or even four to highlight more of these incredible musical pioneers. Again, I’m Robert Estrin and this is LivingPianos.com, Your Online Piano Resource.
Welcome to LivingPianos.com. I’m Robert Estrin. Have you ever heard someone play the piano and every chord just sounds beautiful? Whether they’re reading written music or improvising, the chords seem rich and perfectly balanced. Yet when you try to do the same, the chords might sound cluttered or harsh. Why is that? It turns out, the secret to beautiful-sounding chords lies in something deeply rooted in nature: the overtone series.
What Is the Overtone Series?
The overtone series is the natural phenomenon that gives sound its color and character. Any musical sound—whether from a piano, another instrument, or even a non-musical source—contains more than just its fundamental pitch. Overtones are additional pitches that naturally occur above the fundamental note. They’re what give sound its richness, just like how a color is often made up of many different shades. A pure sine wave with no overtones sounds flat, lifeless, and boring. When overtones are present, the sound becomes full and musical.
You can even observe overtones on the piano. By silently pressing a high C key (lifting the damper without making sound), and then firmly playing a lower C, the higher string will begin to vibrate sympathetically. This demonstrates that the higher C is part of the overtone series of the lower C.
The Pattern of Overtones
The overtone series begins with notes that are far apart and gradually get closer together. Starting from the fundamental tone, each successive overtone comes closer in pitch to the next. After a certain point, the overtones are separated only by half steps. This pattern is crucial because it explains why some chords sound better than others. When chords are constructed in a way that aligns with the spacing of the overtone series, they naturally sound pleasing to the ear.
Spacing Is Everything
Here’s where this becomes especially practical for piano players. Chords voiced with wide spacing between the bass and the upper notes tend to sound much better than chords that are clustered closely in the lower registers. For example, if you play a chord in the left hand using tightly packed notes, the result is often muddy and unpleasant. But if you space the bass note well below and place the rest of the chord in the right hand, the result is far more pleasing. This principle isn’t just for improvisation or modern styles. It has deep roots in Western classical music.
The Influence of Bach and Western Harmony
Western harmony, as we know it, evolved from vocal writing, particularly in the chorales of Johann Sebastian Bach. These chorales consistently show that the bass note (the lowest note) is spaced significantly below the upper voices. This spacing mirrors the overtone series and results in a resonant, clear sound. Even in simple tunes like “Happy Birthday,” when chords are voiced with space between the bass and the upper notes, the result is much more satisfying.
Beethoven and Beyond
This approach to chord voicing is not limited to Baroque music. Take, for example, the second movement of Beethoven’s Pathetique Sonata. When the arpeggios in the left hand are reduced to block chords, you can see how Beethoven employs the same concept. The bass notes are separated from the other tones, allowing the chords to breathe. This is a continuation of the harmonic principles established through centuries of musical development, rooted in the overtone series.
Applying This to Your Playing
Whenever you play chord progressions, remember to space your chords so that the bass note stands apart from the upper notes. Let the right hand handle most of the chord tones, especially when supporting a melody. Whether you’re playing simple triads or complex harmonies, this approach creates a much more rewarding and musical sound. Compare this to playing everything close together in your left hand and it usually results in a cluttered mess. Giving your chords room to resonate in line with the overtone series is key to making your playing sound professional and beautiful.
A Universal Principle
This concept of voicing chords according to the overtone series isn’t limited to classical music. From Bach to Beethoven and into contemporary styles, it’s a universal principle of good voice leading and harmonic balance. By understanding and applying this natural spacing, you can dramatically improve the sound of your chords. I encourage classical players to study their scores and observe how often composers use this technique. It’s everywhere, once you start to notice it. Thanks for joining me. I’m Robert Estrin, and this is LivingPianos.com, Your Online Piano Resource.