Welcome to LivingPianos.com. I’m Robert Estrin. A question I get all the time is: How do you know when your piano needs to be tuned? There’s actually a wide range of answers, so I’m going to give you the essential information so you can properly maintain your piano.
How Often Should You Tune Your Piano?
The Piano Technicians Guild recommends tuning your piano four times a year. That might sound excessive, especially if you haven’t tuned your piano in years. For most people, I suggest at least twice a year. Seasonal changes, like switching between heating and air conditioning, can cause the pitch of your piano to shift. The entire instrument can go flat or even sharp depending on environmental changes.
Checking Your Piano’s Pitch
One simple way to check your piano is by using a tuning app on your phone. Play an A and see if it’s close to A440. If it’s hovering around 440 or 441, you’re in decent shape. But if it starts drifting lower, that’s a sign your piano needs attention. It’s also important to check different registers. Sometimes the middle of the piano may be in tune, while the upper octaves have dropped significantly in pitch.
It’s Not Just About Pitch
Pitch is only part of the story. Most piano notes have three strings, and the first thing that goes out of tune are the unisons. That means those three strings are no longer perfectly aligned with each other, even if the overall pitch seems correct.
When a note is perfectly in tune, it has a pure, steady sound. But when one string is slightly off, you’ll hear a slow wave in the sound. As the strings drift further apart in pitch, that wave becomes faster and more noticeable.
Listening for “Waves” in the Sound
You can test this yourself by playing slowly through the keys. Listen carefully for any notes that sound like they’re pulsing or beating. That pulsing is caused by slight differences in vibration between the strings. For example, if one string vibrates at 440 cycles per second and another at 441, you’ll hear a beat once per second. The greater the difference, the faster the wave.
Upper notes tend to go out of tune more quickly and can be harder to keep stable, so you may encounter these waves there more often. However, this can occur anywhere on the piano, so it’s important to listen carefully across the entire keyboard for any notes that don’t sound perfectly pure.
Why Regular Tuning Matters
You might wonder why technicians recommend tuning so frequently. It’s not just about business. Regular tuning actually helps your piano stay more stable over time. In fact, the more often a piano is tuned, the better it holds its tuning. Consistent maintenance keeps the instrument closer to proper pitch, reducing large fluctuations. For example, in conservatories, concert grand pianos are often tuned daily. These instruments become extremely stable as a result.
What Affects Your Piano’s Stability?
Several factors influence how quickly your piano goes out of tune:
Temperature and humidity changes
•How much the piano is played
•How forcefully it is played
•How regularly it has been tuned in the past
•Heavily used pianos, like those in practice rooms, can go out of tune very quickly, sometimes in just a single day of intense use.
New Pianos Need Extra Attention
If you have a new piano, or one that has been recently rebuilt or restrung, it will require more frequent tuning. The strings are still stretching and settling, especially during the first couple of years.
To Sum it Up:
There are two main things to watch for: overall pitch and the purity of individual notes. If your piano is noticeably off pitch or you hear wavering in the sound, it’s time for a tuning.
There’s a lot to this subject, but these guidelines will help you stay on top of your piano’s care and keep it sounding its best. If you have specific questions, don’t hesitate to ask me. Thanks again for joining me here at LivingPianos.com, Your Online Piano Resource.
Welcome to LivingPianos.com. I’m Robert Estrin. Today I’m addressing a thoughtful question from a viewer named Jay about memorization and whether it’s really necessary for pianists.
Jay’s Question About Memorization:
I know that you’re an advocate for memorization, and I continue to be amazed at the depth and breadth of your repertoire. We recently heard Daniil Trifonov play the Brahms 2nd Concerto from memory. Amazing! The reason I’m writing is that we’ve heard other performances where the pianist used a tablet. Lang Lang played the Bartók (with the Vienna Philharmonic in West Palm Beach). We’ve also heard Yuja Wang and Simone Dinnerstein, and they all were using tablets.
My teacher, Dr. Marshall Griffith, has instilled in me the number one goal: to make beautiful, meaningful music! Especially as a 74-year-old, I’m not able to memorize the complex music I play. My question: Is there an unwritten “rule” that pianists play from memory?
This is a terrific question, and the answer might surprise you.
When Playing from the Score Makes Sense
Playing with the score on the piano is not only acceptable, but essential in many situations. For example, a pianist performing within an orchestra will almost always use the score. The same is true in chamber music, where the pianist’s part includes all the other instruments. In these cases, having the score is not just helpful, it is necessary.
A Look Back at Performance Traditions
Interestingly, memorization was not always the norm in keyboard performance. In the Baroque and Classical eras, much of the music did not require extreme movement across the keyboard. There are exceptions, of course, such as some Scarlatti sonatas and certain works by Mozart and Haydn. But generally speaking, the music lay comfortably under the hands, making it practical to perform while reading the score.
Why Memorization Became Standard
As we move into the Romantic period, everything changes. Composers like Liszt and Chopin wrote music filled with large, fast leaps and expansive gestures across the keyboard. In this repertoire, memorization became a practical solution. It allows the pianist to focus entirely on the hands and the keyboard, rather than constantly shifting the eyes between the music and the keys.
What About Modern Performances?
It has become accepted to use the score when playing complex contemporary music. Even so, in solo piano performance, playing from memory is still generally the standard. This isn’t just tradition for tradition’s sake. It comes down to practicality and musical freedom. When a piece is truly memorized, you can devote your full attention to shaping the music, rather than navigating the page.
Can Anyone Learn to Memorize?
If you feel that you can’t memorize, it may simply be that you haven’t been shown how. Memorization is not a passive process. Many people think that if they play a piece enough times, it will naturally stick. In reality, effective memorization requires a deliberate and structured approach.
The Three Essential Skills For a Pianist
In my teaching, I emphasize three essential skills that every pianist should develop: memorization, sight-reading, and improvisation. It’s quite common for pianists to become strong in one or two of these areas while neglecting the others. Each skill has its own methods and benefits, and together they create a well-rounded musician.
Jay, thank you for your excellent question! If you have questions you’d like me to address, feel free to reach out to me – Robert@LivingPianos.com
Welcome to LivingPianos.com. I’m Robert Estrin. Today we are diving into part three of the Chopin G minor Ballade, focusing on the coda of this monumental work. If you have been following along, you know just how challenging and exhilarating this final section can be.
Start the Coda Early
One of the most important practice tips is to begin working on the coda early in your learning process. Do not wait until you have learned the rest of the piece. The coda can take a significant amount of time to develop, and if you leave it until the end, it may delay your overall progress. By starting it early, even before reaching the halfway point of the piece, you allow it to grow alongside the rest of your interpretation.
A Cascade of Techniques
Much like the middle section of the Ballade, the coda presents one technical challenge after another. It is a continuous stream of different techniques, each requiring careful attention. One particularly tricky aspect is the rhythmic interplay between the hands. This takes time to internalize, so be patient and methodical. Pay close attention to the articulation in the coda. Only the single notes are marked staccato. Many pianists mistakenly play everything short, but that is not what Chopin wrote. Let the chords have more length. This creates a richer, more beautiful sound and brings out the musical phrasing more effectively.
Slow Practice Is Essential
Slow practice is your foundation. Take the time to articulate everything exactly as written, including accents and note lengths. This ensures clarity and control as you gradually build speed. Practicing hands separately is also invaluable here. Each hand has very different technical demands, and isolating them allows you to master their individual roles before combining them. Experiment with different rhythms. Try dotted rhythms, reversed dotted rhythms, and varied groupings of notes. These approaches help you gain control and evenness. You can also practice passages as chords to better understand the harmonic structure, then return to the written figuration with greater confidence.
Accents Shape the Music
Accents are crucial in shaping the music. They help define the structure and give the illusion of power without requiring you to play everything loudly. Reserve your strongest playing for the most important notes and phrases.
Endurance Through Relaxation
One of the biggest hurdles in any intense coda is simply lasting until the final chord. The key is learning to relax within the music. I recommend experimenting with different note groupings to find the natural “pivot points” where your hand can breathe. By practicing intentional stops to release tension, you’ll develop micro-relaxations that occur naturally as you play. This lets you conserve energy and avoid the “wall” of fatigue. Great piano playing isn’t just about power; it’s about the efficient use of every ounce of energy.
Build Speed Gradually
For fast passages, use a metronome and increase the tempo gradually. Work in small sections and aim for precision at every stage. In unmeasured or freer passages, focus on hand positions and groupings. Break them into small units, practice each group, and then connect them. Always think of these passages as melodic, even at high speed. They are not just technical exercises but expressive lines.
Scales and Pedaling
The scale passages require solid technique. When starting a scale, hold each note long enough at the beginning, and start gently so you have time to build volume as you ascend. It doesn’t need to be loud from the very bottom. Many pianists blur these passages with the pedal. My father, Morton Estrin, would always lift his foot off of the pedal entirely on these runs. Another approach is to use subtle pedaling, perhaps refreshing it with each octave to maintain clarity while adding resonance.
Octaves and the Role of the Wrist
The final section with octaves demands proper technique. Octaves should be played primarily with the wrist. A flexible, controlled wrist is essential. The arms are too slow, and the fingers alone don’t have enough power. You need to isolate the wrist motion from the arms to play the octaves cleanly and with control. This will give you both speed and endurance.
Experiment and Discover What Works for You
There is no single way to master this coda. Try different practice techniques, dynamics, and articulations. Play one hand louder than the other. Change rhythms. Explore new approaches. The key is to listen carefully and remain open to experimentation. Through this process, you will discover what works best for you.
The coda of Chopin’s G minor Ballade is as thrilling as it is demanding. With thoughtful practice, attention to detail, and a balance of strength and relaxation, you can bring it to life with confidence and musicality. The primary practice that will solidify this coda is working section by section, both hands separately and hands together, playing progressively faster with the metronome.
I hope you find these insights helpful in your practice. Let me know what you think in the comments here at LivingPianos.com and on YouTube!
Welcome to LivingPianos.com. I’m Robert Estrin. This is part two of the Chopin G minor Ballade complete tutorial here on LivingPianos.com. In this section, we explore some of the most powerful and technically demanding music in the work, along with practical strategies for practicing it effectively and musically.
From Poetic to Heroic
At this point in the piece, the main theme returns in a grand, heroic form. What’s remarkable here is how the same theme takes on a completely different character. Earlier it sounded poetic and reflective. Now it appears in massive chords with tremendous strength and breadth. Part of this transformation comes from the key change. Chopin moves from E-flat major to A major, a tritone away. That alone gives the music a strikingly different color. Combined with the powerful chordal writing and rich voicing, the familiar theme suddenly feels heroic rather than intimate.
Practicing the Massive Chord Section
One of the most important practice methods is to work without the pedal. Practicing without the pedal forces you to create legato with your hands instead of relying on the pedal to connect the sound.
The secret to producing powerful chords without harshness is to play from the surface of the keys. If you try to strike the chords from above, the sound becomes harsh and unpleasant. Instead, rest your fingers on the surface of the keys so they are not yet depressed, then release the weight of your arms into the chords. This approach produces a warm, full tone. Even without the pedal, you can achieve remarkable legato simply by using arm weight and careful control.
Creating the Illusion of Power
When learning this passage, play as legato as possible. You do not need to play every note at full volume. In fact, it can be helpful to sacrifice a little power in the inner chords while anchoring the octaves. By emphasizing the octaves and keeping the other notes lighter, you create the illusion of great strength without using excessive effort. When the pedal is added, the result sounds far bigger than what you are actually playing.
Listening for Inner Voices
Another detail that should not be ignored is the inner voice in the right hand. There is a beautiful countermelody hidden within the texture. Bringing out these inner notes adds richness and musical interest. Fingering is also important for achieving good legato. Whenever possible, use the fourth finger on black keys and sometimes even on white keys if it helps connect the notes smoothly. All of these small details contribute to a more beautiful sound.
Practicing the Massive Chord Section
As the music climbs toward its peak, it can help to practice the passage in small sections. One useful strategy is to isolate groups of notes and practice lifting between them. This allows the hand to reset and stay relaxed.
Slow practice remains the foundation. Working carefully with a metronome and gradually increasing the tempo is essential. But once the notes are secure, you can experiment with other approaches to improve fluency. For example, temporarily leaving out a note can help your hand feel the shape of the passage. Once the motion feels natural, add the missing note back in. Rhythmically, this section also features a hemiola effect, where the accents shift against the expected beat.
Turning Runs into Chords
Next comes a passage everyone recognizes, full of fast-moving notes. A great way to practice this kind of writing is to turn the runs into chords.
When you play the notes as chords, you immediately discover the most comfortable fingering. It also reveals the harmonic structure underlying the passage. Once the harmony and fingering are clear, returning to the original pattern becomes much easier. You can also reverse the patterns, practice in different directions, or apply rhythmic variations.
Choosing the Right Practice Technique
There are many practice techniques available, but the goal is not to try every single one. Instead, experiment until you find the method that reveals the solution for each specific passage. If metronome practice alone solves the problem, that is wonderful. But when progress stalls, that is the time to experiment with rhythms, accents, note groupings, or phrasing changes. Think of practice as having a toolbox. You only need the tool that solves the problem at hand.
Relaxation Through Note Groups
A key concept for difficult passages is practicing in small note groups with complete relaxation between them. Rather than pushing through a long string of notes, play a short group, release all tension, and then begin the next group as if starting fresh. It is almost like taking a brief rest in the middle of the passage. This approach prevents tension from building and allows you to maintain control even at high speeds.
Strength Versus Control
Some pianists develop enormous strength by practicing many hours a day. That strength can carry them through extremely demanding passages. But many legendary pianists relied more on relaxation and control than brute force. Their playing had a jewel-like clarity and refinement. Relaxation not only makes technical passages easier, it also produces a far more beautiful tone.
Working with the Metronome
When increasing tempo with the metronome, raise it one notch at a time. It may seem slow at first, but it is incredibly effective. Only raise the tempo when you can play the passage correctly and comfortably. If the notes are accurate but you feel tense, the tempo should remain where it is. At first the progress may feel slow. But once the passage becomes secure, the tempo can increase surprisingly quickly.
In fast passages, the motion should come primarily from the fingers. Avoid relying on arm weight or large wrist movements, which are better suited for slower, lyrical playing. Light finger action close to the keys allows the passage to scale up to fast tempos.
Practicing Short Note Groups at Tempo
Another valuable technique is to practice very short groups of notes up to speed. This trains your hand to play the passage at tempo. Once the pattern feels natural, you begin linking the groups together while maintaining relaxation between them. This method helps solve the common problem of passages that feel easy slowly but fall apart when played quickly.
Clarifying the Left-Hand Rhythm
Later in the piece the left hand introduces a distinctive rhythmic pattern. When practicing slowly, it can help to exaggerate the rhythm.
nstead of treating it as a simple eighth rest followed by an eighth note, try lengthening the rest and making the following note extremely short. This exaggeration clarifies the rhythm so that it feels precise when played faster. Thinking of each measure as a fresh starting point also helps keep the hands relaxed.
Applying the Same Practice Tools
Throughout this section the same practice tools can be applied repeatedly:
Turn runs into chords.
Practice accents.
Use rhythmic variations.
Break passages into small groups.
Work without pedal to refine fingering and legato.
The most important idea is that practice should always involve discovery. If something is not improving, change the approach.
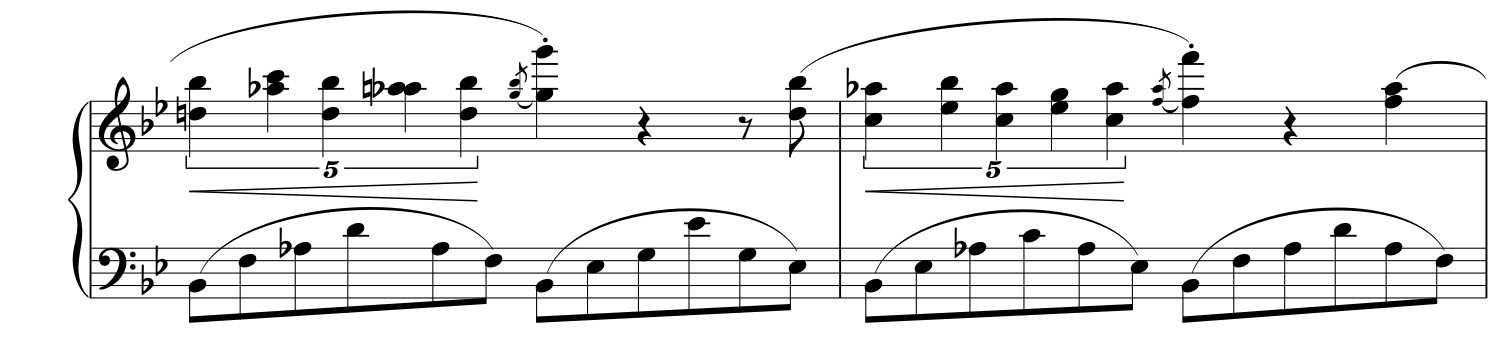
The Five Against Six Passage
One particularly challenging moment has five notes in one hand against six in the other.
When practicing slowly, exact alignment can be confusing. Instead, focus on understanding which notes fall between others. Practicing the alternation between hands helps clarify the relationship. The placement of the grace note also matters. If it is played before the beat, the rhythm can unintentionally become six against six. Placing it on the beat preserves the intended five-against-six relationship.
Building to the the Climax
As the music approaches the climax, make sure the low B-flat octave in the left hand really speaks. Even if the surrounding notes are not extremely loud, that single note can create a powerful sense of arrival. The high B-flat at the top of the texture reinforces this climactic moment as well.
Returning to the Main Theme
After the dramatic climax, the music gradually relaxes and melts back into the main theme. This passage can be surprisingly tricky because the fingering does not fall naturally under the hand. Finding the most comfortable fingering takes experimentation.
When the theme returns, it should not sound the same as it did at the beginning. At first the theme felt youthful and newly discovered. By this point it has experienced the turbulence and emotional extremes of the music. The final return has a different character, more somber, quieter, and more reserved.
The Final Technical Passage
Before the coda there is another demanding passage of sixths. When playing sixths, it’s not always possible to connect both notes smoothly. By ensuring at least one note is connected, you can maintain a legato line. Good fingering will make this easier. Practicing the passage in short segments allows the hand to learn each pattern comfortably before connecting them.
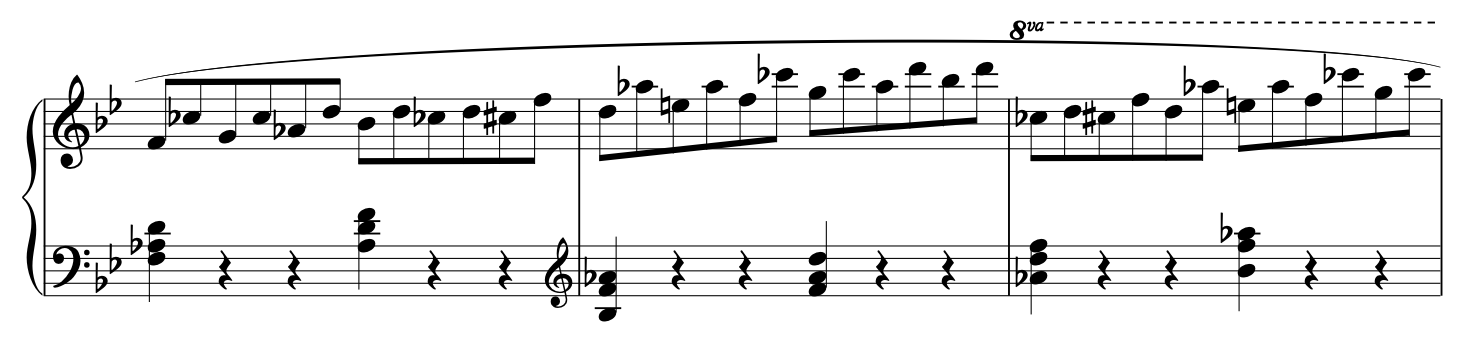
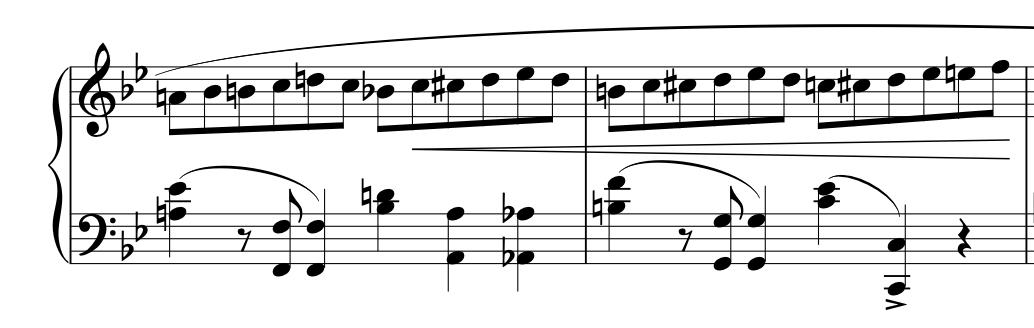
Approaching the Grand Coda
All of this leads to the famous coda, one of the most thrilling conclusions in Chopin’s music. It is a roaring, virtuosic ending that brings the Ballade to its dramatic finish. We will get into the blistering coda in part 3!
I’d love to hear how these approaches work for you! If you’ve tried any of these practice techniques, or discovered your own ways to tackle challenging passages in the G minor Ballade, share your experiences in the comments here at LivingPianos.com and on YouTube. Your insights can help others in this community as we explore this extraordinary music together.
Welcome to LivingPianos.com. I’m Robert Estrin. Today you’re going to get a deep dive into how to play the Chopin Ballade in G minor. This is a piece that I absolutely love, and so many of you have asked for a tutorial on it. I thought, yes, let’s do it. I even have a complete performance that I’ll reference throughout this discussion. You can find the full performance here.
There are many brilliant performances of this piece available online. I was fortunate enough to hear Vladimir Horowitz perform the Chopin G minor Ballade live on more than one occasion. You can also listen to great interpretations by Arthur Rubinstein and countless others throughout history. Today we’re going to go bit by bit through the first section of the piece. This will be the first installment of a three-part series. As always, feel free to share in the comments which pieces you’d like to see covered in future videos like this.
Let’s get right into it. I’ll start at the beginning and talk about how to approach each of the unique sections in the opening part of the Ballade.
Understanding the Opening Harmony
Right at the beginning there is something fascinating harmonically. The Ballade is, of course, in G minor. So what is that A-flat major chord in first inversion doing there? If you know some music theory, you’ll recognize it as a Neapolitan sixth chord. This is a major triad built on the flatted second degree of the scale. In G minor, you go to the second note of the scale which is A, flatten it to A-flat, build a major triad, A-flat-C-E-flat, and place it in first inversion with C on the bottom, C-E-flat-A-flat. That gives you the Neapolitan sixth. It’s a brilliant harmonic idea. When you consider that Chopin was in his early twenties when he composed this piece, it becomes even more impressive that he completed this work around the time of his twenty-fifth birthday.
Establishing the Pulse and Using Rubato
It is very important to have a steady beat in this piece, but there is also plenty of room for rubato. Rubato is the give and take of tempo. You never gain or lose time overall, but there is subtle speeding up and slowing down, almost like a car cresting a hill. It creates a wonderful expressive effect. The secret to effective rubato is thinking in terms of the long beat. If you try to think of every eighth note individually, rubato would be impossible. Even thinking in quarter notes can feel restrictive. But if you think in larger units such as half notes, you create a slower underlying pulse that allows freedom within the beat. When you maintain that broader pulse, you can shape the tempo expressively without losing the listener. In fact, a good test is this: if someone cannot tap along to your playing, you are probably using too much rubato. There must always be a pulse or the music dies.
Shaping the Opening Phrase
The opening section ends with a long note that must be held long enough to sustain the tension before the tempo change that follows. Count it carefully so the phrase breathes naturally. When the new section begins, it is important not to stretch the rhythm excessively. Sometimes you hear performances where the timing becomes overly flexible, and the music loses its majesty. If you listen to Arthur Rubinstein’s performance, you’ll hear the grandeur that comes from maintaining rhythmic integrity. Let the story unfold naturally. You don’t have to manipulate the theme too much. When played with a strong underlying pulse, the melody reveals its beauty on its own.
Learning the Piece: Memorization First
This tutorial is not about the basic mechanics of learning a piece, since I have many videos devoted to that topic. But I do want to give a brief overview.
You will never play the Chopin G minor Ballade comfortably if you are constantly reading the score. There are enormous jumps later in the piece, particularly in the coda. It is nearly impossible to look at the music and your hands at the same time during passages like that. Instead, read through the piece once or twice to become familiar with it. Because it is so long and complex, you may not read it all in one sitting. This initial reading will also help you decide whether it is the right time for you to tackle this work. If you have not played much Chopin yet, such as preludes, waltzes, or mazurkas, this may not be the best place to start. The Ballade is a monumental and virtuosic composition.
When you begin learning it, take very small sections. Work hands separately first. Learn every detail: notes, rhythm, fingering, phrasing, and expression. Memorize the right hand, then the left hand, and only then put them together. Memorize that as well before moving on. Do not practice the entire piece repeatedly and then try to memorize it later. That approach often ingrains mistakes that are extremely difficult to undo. Study the score carefully from the start.
Bringing Out the Melody
In the next section, the melody must clearly sing above the accompaniment. One excellent practice technique is to play everything staccato except the melody notes. This helps train your hands and ears to distinguish the melodic line. However, if there are half notes in the tenor voice of the left hand, those should be held because they form an important counterline. Practicing in this way creates clarity so that when you return to normal playing, the melody naturally stands out.
Another useful method for bringing out the melody is to practice the accompaniment with a light finger staccato while playing the melody legato. This contrast trains your hands to separate the musical layers. Later you can control dynamics more effectively, allowing the melody to project while the accompaniment remains supportive.
Measuring Your Trills
Even though a trill may sound like a flurry of notes, it must still be measured. Decide exactly how many notes you will play. It does not need to be an enormous number. Choose something comfortable, but make sure you know precisely how many notes there are. That is far better than leaving it to chance and risking an awkward ending to the trill.
Achieving Legato Without Overusing Pedal
Whenever possible, connect notes with your fingers rather than relying on the pedal. For example, when playing octaves, change fingers on black keys. Use the fourth finger, or even the third if your hand is big enough. This enables a smoother legato. Remember that you do not have to connect both notes of the octave. If you connect just one note, the ear will perceive it as legato. Using your fingers to connect notes allows the pedal to serve its true purpose: adding color, not compensating for incomplete technique.
Practicing Fast Passagework
Eventually you encounter the first fast cadenza passage that appears almost suddenly. This can feel intimidating if you are not prepared. There are several effective practice approaches. First, practice only the notes that coincide with the beat, particularly where the hands play together. If that is still difficult, practice the finger patterns within each hand position. Ultimately, piano technique is largely about hand positions and finger patterns. Once these are secure, fluency becomes much easier.
Building Strength and Relaxation
A strong technique requires both strength and relaxation. Sometimes it is beneficial to practice very slowly with a metronome, without pedal, articulating every note clearly from the fingers. This builds strength and awareness of the keyboard. At the same time, you must practice relaxation. Work in note groups, pausing momentarily so your hands are relaxed and positioned over the notes of the next hand position. Gradually reduce the pause until the passage flows smoothly. By working on both strength and relaxation, you build the foundation for a confident performance.
Practicing Without Pedal
Practicing without pedal is incredibly valuable. It removes the veil from your playing and reveals exactly what your fingers are doing. When you work this way, you discover whether your fingering truly connects the notes and if your technique is secure. Many great pianists practice extensively without pedal, including every teacher I have studied with over the years. Slow practice with the score and a metronome is one of the best ways to reinforce accurate playing.
Exploring the Expressive Theme
Later in the section, a stunningly beautiful theme appears. This theme returns later in the Ballade in different forms. Here it is poetic and delicate. Later it reappears heroically in A major. At the repeat of the theme, using the una corda pedal can help create a softer, more intimate tone. Maintain the larger pulse, even if the tempo flexes slightly. The audience should always feel that underlying beat.
Expressive Freedom in Chopin
Chopin’s music allows tremendous interpretive freedom. Some pianists emphasize certain inner voices more than others. Some play the passage very subtly, while others bring those notes out more strongly. There is no single correct approach. Chopin himself did not play his works the same way every time. In fact, he even had different versions of some of his pieces when performing in different countries. So rather than worrying about playing exactly what the composer intended, think of the music as a palette for emotional and sonic exploration.
Wrapping Up the First Section
As this section concludes, the pulse returns clearly. A slight ritardando and the use of the soft pedal can help shape the transition beautifully.
This brings us to the end of the first installment of this lesson.
Recap of Key Practice Strategies
Let’s summarize the main ideas from this first part.
First, read through the piece briefly, then begin memorizing right away in very small sections.
Second, think in terms of the long beat. This gives you freedom for rubato while maintaining a clear pulse.
Third, practice technical passages slowly with the metronome and without pedal to build strength and accuracy.
Fourth, work in note groups and practice relaxation before each time the hands play together.
Finally, isolate hand positions and finger patterns when tackling fast passages.
These methods will help you develop the speed, power, and relaxation necessary to play the Chopin Ballade in G minor successfully.
I hope you’re enjoying this exploration. It’s one of my favorite pieces, and I look forward to hearing your thoughts in the comments here at LivingPianos.com, Your Online Piano Store.