


Welcome back to our multi-part series on the Burgmuller Studies. These pieces are really great for piano students at a fairly elementary level yet provide some gorgeous music. Last time we covered La Candeur (Frankness) and this time we are going to discuss L’Arabesque.
Where La Candeur provided beautiful lyricism, L’Arabesque provides excitement. This is a great piece to study because it presents quite a few technical challenges. It also provides a great opportunity to explore phrasing – staccatos and slurs as well as accents. If you were to play this piece without those elements of phrasing it would be incredibly lifeless and dull.
How do you get this piece to sing and more specifically, how do you get it to be snappy and fun? It all comes down to the wrist. I encourage you to watch my original lesson on how to utilize your wrists but to describe it quickly here: The wrists must be identified separately from the arms. The arms are big and heavy and can’t give you the same quick motion the wrists can.
Take your hand and place it over the first chord in the piece. Place your fingers on the keys but don’t push down. Then slowly raise your wrist so your fingers are a little less than an inch above the keys, drop them and play the notes and then snap your wrist back into place over the keys. Keep practicing this and make sure that you aren’t using your arm at all – all the motion in your playing should come from the wrist. The arms are great for strength but they will not give you the speed you will need to play this piece; the motion must come from the wrist.
In this first section you should practice these chords with the wrist until you feel absolutely comfortable playing them.
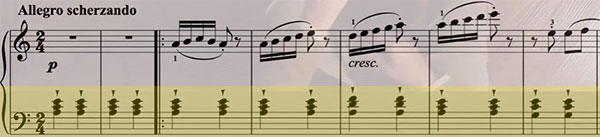
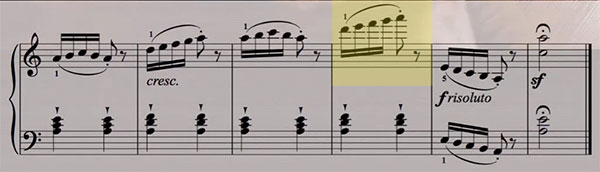
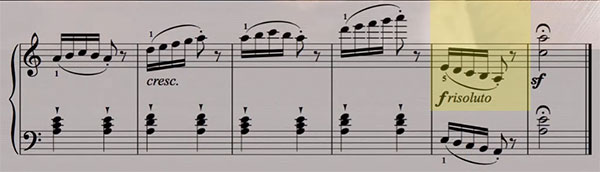
The right hand in this piece also contains phrasing and it’s very important that you don’t overlook it. As we can seen in the picture below, there are notes with slurs connecting them and they end in a final note that is played staccato. It might not always be written as staccato but they should be played as such because it’s at the end of a slur. Why is this? Staccato means “not connected” and the end of a slur is not connected. In this piece, which has a brisk tempo, you will want to play the end of your slurs as staccato.
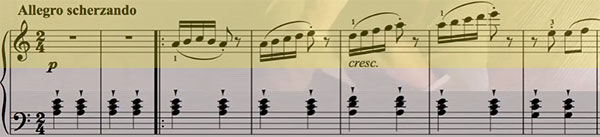
The best way to play these note groups is by playing the slurs and then ending by having your hand come up for the last note. It creates a nice sound and helps to play that last note staccato. Practice these groups of notes in your right hand – make sure you come up for the last note in each group until you are comfortable playing them.
Now try practicing with the hands together.
In the next section the left hand will continue with staccato chords but the right hand has eighth notes and it’s extremely important that you phrase these correctly. You’ll need to pay attention to the staccatos and legatos so that you can bring life to this music.
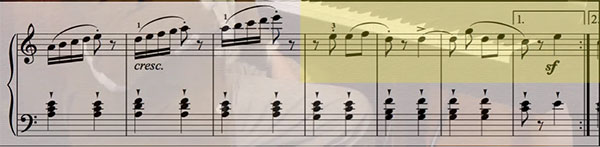
You can do the same type of motion with your wrists for the staccatos in this section. Release the wrist upward on them to get a nice snappy sound. On the accents, let your wrist come down for emphasis. When you put this together with the left hand it you will achieve excellent clarity of voices – the contrast of staccato and legato elements.
In the next section the hands reverse techniques. The right hand becomes legato and the left hand has staccato with the down up motion with the wrist.
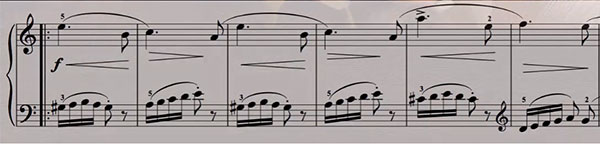
Now we will flash forward to the end of the piece where you must move your hands instantly in order to play the last chord. This can be a real challenge for students but it’s a great learning experience which I have a method that will help in any situation like this.
You’ll need to get from here:
The here:
That’s not going to be easy! However, there is a relatively simple way to overcome this problem. You’ll need to find out the perfect hand position for that last series of notes. Go ahead and place your hands there and remember that position. Now, play the series of notes before it and right when you end, place your hands and arms over the last chord instantly. Don’t play any of the notes yet – just get your hands over the chord. Keep doing this until you consistently get in the right position. When you feel confident go ahead and play the last chord. Keep doing this until you can play it over and over again without any issues. This is an extremely helpful technique for all your music that requires large leaps. Here is an article and video on this subject:
I hope this lesson has been helpful for you. If you have any comments, questions or suggestions for future videos please contact us directly: info@LivingPianos.com (949) 244-3729