


Despite the declining industry in the United States, the piano is one of the most popular instruments in the world and nowhere is it more popular than in China. I was fortunate to attend the recent Music China convention in Shanghai and it was an eye-opening experience on just how vast the piano industry is there.
Many of you have seen Chinese manufactured pianos in local piano stores, but this is such a small portion of the industry and what is currently going on there. Consider these facts:
There are more companies making pianos in China than there are piano stores in the USA!
The largest piano manufacturer in China (Pearl River) has three factories in China, any one of which produces more pianos than all the new pianos sold in the USA each year. The difference in the size of the industry is staggering and the innovations are remarkable.
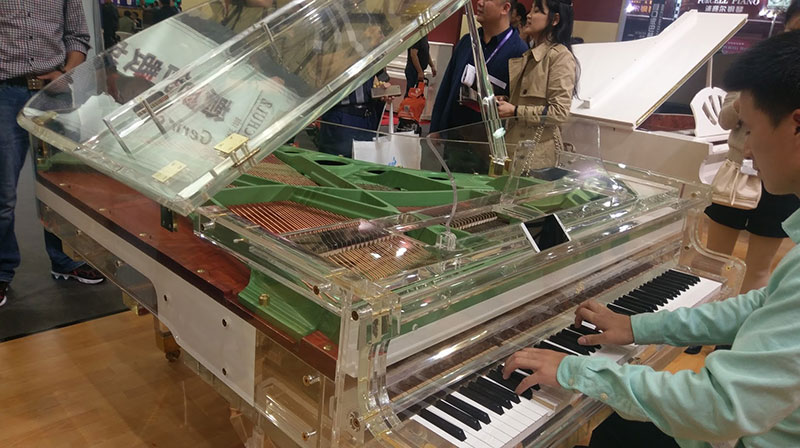
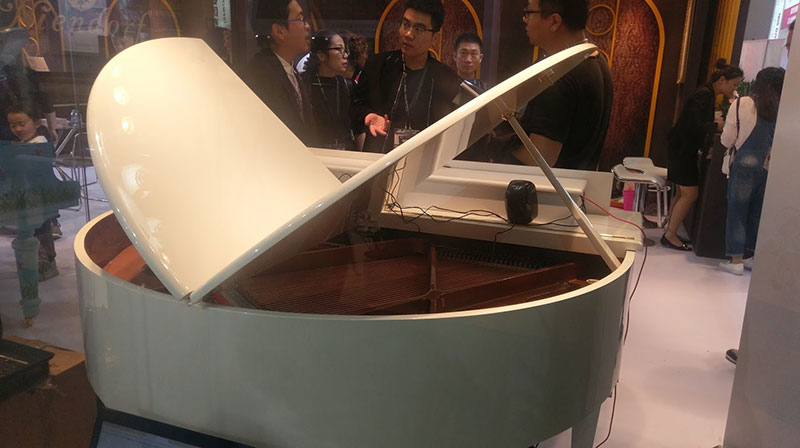
Pianos with touch screens on the fallboards, pianos with butterfly lids that open in both directions, pianos that are made out of plexiglass and even pianos with two keyboards, one on each end for a dueling piano!


The Chinese have taken to the piano like people did in this country over a hundred years ago. It’s an exploding market and it’s incredibly popular with younger generations. The Chinese purchase ten times the number of new pianos than Americans and that’s why the export market is only a small fraction of their output. Most of the pianos produced and sold are uprights like in the rest of the world because of smaller homes than in the United States. However, they produce plenty of grands and even concert grand pianos.
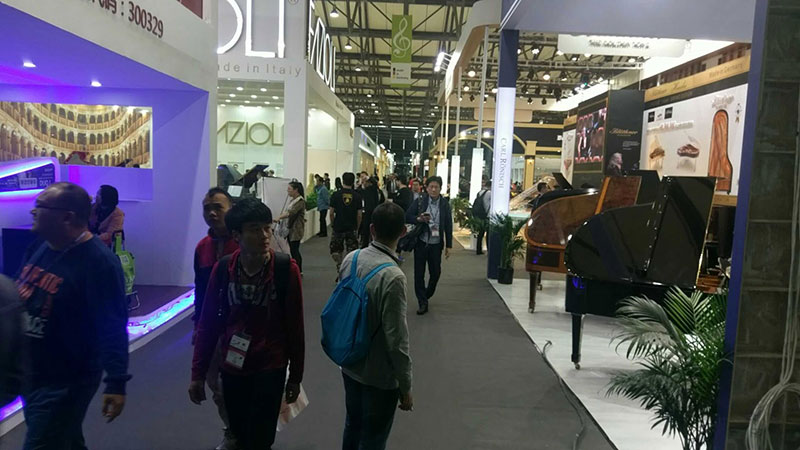
To put things into perspective, the biggest show in North America (The National Association of Music Merchants (NAMM) show in Anaheim, California) has only one main room upstairs full of pianos easily covered in about 20 minutes. The Music China show has over three huge field houses full of pianos; I didn’t even have enough time to see all the instruments in the course of several days at the show!
So why is the piano so popular in China? Western culture wasn’t widely available to the Chinese until after the cultural revolution in the 1970’s. Today, the emerging consumer class in China are enriching children with piano lessons by parents who never had the opportunity to learn themselves. Every time I would sit down at a piano at the show, dozens of people crowded around me taking videos because it was a spectacle to see someone my age performing the piano!
I will be returning to China for performances, master classes as well as being an industry advisor. I hope to share the enthusiasm they have for the piano there to people in the U.S. and around the world.
Thanks again for joining us here at Living Pianos. If you have any questions about this topic or any others, please contact us at: Info@LivingPianos.com (949) 244-3729