What is the Best Piano at the 2025 Chopin International Piano Competition?
A Bit of History
Let’s first take a look back at how the competition has evolved in terms of the pianos used. Before 1980, Steinway dominated the competition, along with some appearances from Bösendorfer. That was about the extent of the choices. Then in 1985, the landscape changed dramatically. Contestants were offered a selection of Steinway, Yamaha, Kawai, and Bösendorfer pianos. This marked a new era in the competition, giving pianists the freedom to choose the instrument that best suited their individual style.
By 2010, Fazioli made its debut as one of the official choices. And in the 2021 competition, there were even two different Steinways available, alongside Yamaha, Kawai, and Fazioli.
The 2025 Lineup
That brings us to this year’s competition. Although only about half of the contestants have chosen their pianos so far, we already have a good sense of how preferences are shaping up. This year, the available instruments include:
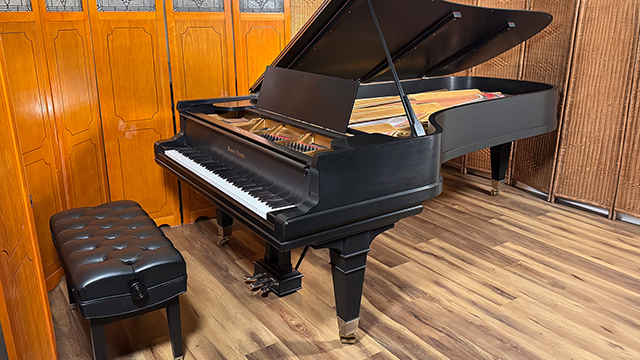
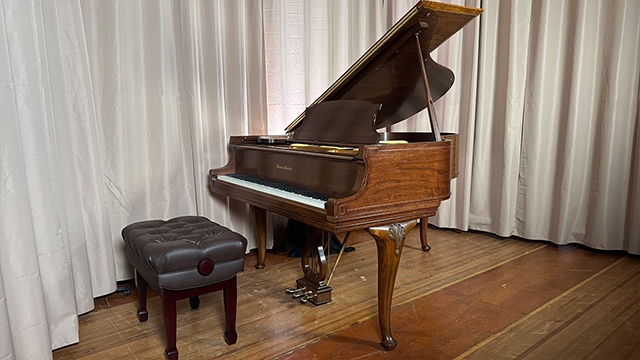
Steinway
Shigeru Kawai
Fazioli
Yamaha
Bechstein
Contestants are given time to try each piano and select the one they feel most comfortable with. And that decision can have a huge impact on their performance.
How Did the Choices Break Down?
Here’s a look at how the selections stand so far:
Steinway was the most popular choice, selected by about 25 pianists.
Shigeru Kawai came in second, chosen by roughly 12 pianists.
Fazioli was picked by 7 contestants.
Yamaha was selected by 3 pianists.
Bechstein was chosen by just 2 pianists.
It’s worth noting that Bechstein is still relatively new to the competition. In fact, they weren’t even present in the 2021 edition. So it’s not entirely surprising that only a couple of pianists chose Bechstein this year.
What Can You Learn From This?
If you’re passionate about the piano, I highly encourage you to watch the performances yourself. One of the best parts of this competition is that many of the pianists play the same repertoire. That gives you a rare opportunity to hear how different pianos respond to the same music, as well as how each pianist brings their own interpretation.
And beyond the technical aspects, it offers a glimpse into how piano manufacturing has diversified and how performers today have more choices than ever before to express their musical vision.
So, what do you think? What’s your favorite piano from this year’s competition? Join the conversation right here at LivingPianos.com and on YouTube. I’d love to hear your thoughts.
Welcome to LivingPianos.com. I’m Robert Estrin. Today we’re going to explore how Beethoven fundamentally transformed classical music. And that’s no exaggeration. When you listen to the music that came before Beethoven and compare it to what came after, there is a noticeable shift. That shift, in large part, was due to Beethoven’s revolutionary musical language. Let’s break down how he did it.
Expansion of Form
One of the most striking things Beethoven did was expand the structure of classical works. In the Classical era, sonatas and string quartets by composers like Mozart and Haydn typically had three movements, and sometimes only two. Beethoven certainly wrote many three-movement works, but he also made four-movement structures the norm in many of his later compositions, often by adding a minuet-trio, typically a scherzo third movement.
But it wasn’t just about the number of movements. Beethoven also expanded the movements themselves. For example, in the sonata-allegro form that typically opens sonatas and symphonies, there’s usually a repeated exposition, a development section, and then a recapitulation. Beethoven’s development sections—especially in his later works—took on a life of their own, reaching dramatic and expressive heights that earlier composers hadn’t approached.
To illustrate this, let’s consider the development section of a late Mozart sonata, the C minor Sonata K. 457. This is a powerful work for its time, and the development section is substantial and intense. But when you contrast it with even an early Beethoven sonata, like the G major Sonata Opus 14 No. 2, the difference is striking. Beethoven extends the development far beyond expectations, introducing new ideas and transformations that push the boundaries of the form. And this is just an early work—his later sonatas go even further.
Deceptive Cadences: The Element of Surprise
Beethoven also introduced unexpected harmonic shifts that were rare in the music of his predecessors. One of the most effective tools he used was the deceptive cadence. This is when you expect a musical phrase to resolve in a familiar way—typically to the tonic—but instead, it takes a completely different direction. For instance, in the development section of the Opus 14 No. 2 Sonata, Beethoven sets up a resolution, but instead lands on an A-flat major chord—completely out of left field. This kind of surprise grabs your attention and creates a sense of drama that Mozart rarely employed in the same way. Mozart’s modulations are beautiful and clever, often leading you to a slightly unexpected place that feels just right. But Beethoven often pulls the rug out from under you, taking you somewhere you never saw coming. Another stunning example can be found in the development of Beethoven’s D major Sonata, Opus 10 No. 3. The movement begins in D minor and suddenly you’re in B-flat major. It’s a jarring, brilliant moment that showcases Beethoven’s flair for the unexpected.
Sudden Dynamic Contrasts
Another hallmark of Beethoven’s style is his use of sudden dynamic changes, particularly subito piano, which means “suddenly soft.” These moments often follow a crescendo, building intensity and then abruptly dropping in volume. It’s a powerful expressive device that Beethoven used frequently. In the third movement of the Opus 10 No. 3 Sonata, for example, Beethoven builds energy only to suddenly drop the volume, creating tension and release in unexpected ways. Even in the lyrical first movement of the famous Moonlight Sonata, Beethoven includes not one but two subito piano markings. These are not to be taken lightly. They are deliberate, and they bring out the emotional nuance of the music. Ignoring them would be a disservice to the music’s intent.
The Birth of Romanticism
Beethoven’s innovations in form, harmony, and dynamics laid the groundwork for the Romantic composers who followed. His ability to expand development sections into full emotional journeys, to use harmony and dynamics in ways that surprised and moved the listener—these were all departures from the classical ideals of balance and restraint. Composers like Schumann, Mendelssohn, and Brahms would not have written the music they did without Beethoven paving the way. This is the true genius of Beethoven: he pushed the boundaries of the classical forms he inherited, infusing them with an emotional depth and unpredictability that changed the course of music history.
Thank you all for joining me. Again, I’m Robert, and this is LivingPianos.com, Your Online Piano Resource.
Welcome to LivingPianos.com. I’m Robert Estrin. Have you ever heard someone play the piano and every chord just sounds beautiful? Whether they’re reading written music or improvising, the chords seem rich and perfectly balanced. Yet when you try to do the same, the chords might sound cluttered or harsh. Why is that? It turns out, the secret to beautiful-sounding chords lies in something deeply rooted in nature: the overtone series.
What Is the Overtone Series?
The overtone series is the natural phenomenon that gives sound its color and character. Any musical sound—whether from a piano, another instrument, or even a non-musical source—contains more than just its fundamental pitch. Overtones are additional pitches that naturally occur above the fundamental note. They’re what give sound its richness, just like how a color is often made up of many different shades. A pure sine wave with no overtones sounds flat, lifeless, and boring. When overtones are present, the sound becomes full and musical.
You can even observe overtones on the piano. By silently pressing a high C key (lifting the damper without making sound), and then firmly playing a lower C, the higher string will begin to vibrate sympathetically. This demonstrates that the higher C is part of the overtone series of the lower C.
The Pattern of Overtones
The overtone series begins with notes that are far apart and gradually get closer together. Starting from the fundamental tone, each successive overtone comes closer in pitch to the next. After a certain point, the overtones are separated only by half steps. This pattern is crucial because it explains why some chords sound better than others. When chords are constructed in a way that aligns with the spacing of the overtone series, they naturally sound pleasing to the ear.
Spacing Is Everything
Here’s where this becomes especially practical for piano players. Chords voiced with wide spacing between the bass and the upper notes tend to sound much better than chords that are clustered closely in the lower registers. For example, if you play a chord in the left hand using tightly packed notes, the result is often muddy and unpleasant. But if you space the bass note well below and place the rest of the chord in the right hand, the result is far more pleasing. This principle isn’t just for improvisation or modern styles. It has deep roots in Western classical music.
The Influence of Bach and Western Harmony
Western harmony, as we know it, evolved from vocal writing, particularly in the chorales of Johann Sebastian Bach. These chorales consistently show that the bass note (the lowest note) is spaced significantly below the upper voices. This spacing mirrors the overtone series and results in a resonant, clear sound. Even in simple tunes like “Happy Birthday,” when chords are voiced with space between the bass and the upper notes, the result is much more satisfying.
Beethoven and Beyond
This approach to chord voicing is not limited to Baroque music. Take, for example, the second movement of Beethoven’s Pathetique Sonata. When the arpeggios in the left hand are reduced to block chords, you can see how Beethoven employs the same concept. The bass notes are separated from the other tones, allowing the chords to breathe. This is a continuation of the harmonic principles established through centuries of musical development, rooted in the overtone series.
Applying This to Your Playing
Whenever you play chord progressions, remember to space your chords so that the bass note stands apart from the upper notes. Let the right hand handle most of the chord tones, especially when supporting a melody. Whether you’re playing simple triads or complex harmonies, this approach creates a much more rewarding and musical sound. Compare this to playing everything close together in your left hand and it usually results in a cluttered mess. Giving your chords room to resonate in line with the overtone series is key to making your playing sound professional and beautiful.
A Universal Principle
This concept of voicing chords according to the overtone series isn’t limited to classical music. From Bach to Beethoven and into contemporary styles, it’s a universal principle of good voice leading and harmonic balance. By understanding and applying this natural spacing, you can dramatically improve the sound of your chords. I encourage classical players to study their scores and observe how often composers use this technique. It’s everywhere, once you start to notice it. Thanks for joining me. I’m Robert Estrin, and this is LivingPianos.com, Your Online Piano Resource.
Welcome to LivingPianos.com. I’m Robert Estrin. Today we’re exploring an important question for anyone beginning their piano journey: What is the ideal first piano? You might wonder if it should be an upright, a digital, or something else entirely. Well, my answer may surprise you.
The Ideal Piano in a Perfect World
If we’re talking about the ideal first piano, the answer is a nine-foot concert grand — something like a Steinway or another high-end brand — placed in a concert hall. Why? Because playing on such an instrument sets you up for success in so many ways. Just like learning to drive in a large vehicle can make driving anything else feel easier, starting on a concert grand piano makes transitioning to any other piano seamless. The rich, rewarding sound, the fluid touch, the precision of the action — all of these elements encourage playing and make practice enjoyable. It’s incredibly motivating. Too often I see parents hesitant to invest in a quality instrument. They buy a cheap or poorly maintained piano, the child hates the sound and feel, and soon loses interest. Then the parents say, “Good thing we didn’t spend the money.” It becomes a self-fulfilling prophecy.
Why a Concert Grand Isn’t Always Practical
Of course, a concert grand in a concert hall isn’t realistic for most people. Aside from the cost, there’s the matter of space. Even if you could fit one physically into a room, the sound might overwhelm the space without proper acoustics. A nine-foot piano needs room to breathe. So, what’s the next best thing?
Grand Piano
A full-size grand piano, though smaller than a concert grand, gives you much of the same responsiveness and tonal quality. For many homes, this is the best balance between playability and practicality. You get that rewarding action and sound without the excessive volume of a concert grand.
Baby Grand Piano
If a full grand is too large or too costly, a baby grand can still offer a very good playing experience. The action is similar to a concert grand in design, though slightly scaled down. This is a strong option for a dedicated beginner or intermediate student.
Tall Upright Piano
A tall upright piano can be a great instrument as well. In fact, some tall uprights have better sound than baby grands! However, the actions on uprights are slower than on grand pianos since hammers go up and down on grand pianos and sideways on upright pianos. Grand pianos have quicker repetition and more nuanced control. Uprights, with their sideways-moving hammers, can’t match that level of responsiveness. This becomes noticeable as students progress, particularly with repeated notes, trills, and fast passages.
Also, the pedals on uprights don’t all function like those on grand pianos. The sustain pedal on the right is the exception and the one beginners use most. So, for early learning, a tall upright in good condition can be very close to ideal.
Console Piano
Shorter upright pianos, like consoles, can still be serviceable for beginners. They don’t offer the best sound or action, but they may provide an affordable option. If you go this route, just be sure it’s in solid condition. A poorly functioning piano of any type can hinder progress.
Hybrid Pianos
Hybrid pianos are an excellent solution for many players. These instruments combine digital sound with a real grand piano action in a more compact cabinet. While they don’t replicate the full experience of an acoustic instrument, some offer incredibly realistic feel and sound for a much lower price and smaller footprint. And they can be played with headphones.
The Absolute Minimum: 88-Key Weighted Action Digital Pianos
If you’re looking for the bare minimum instrument to study piano seriously, it’s a digital piano with 88 weighted keys. Anything less simply won’t develop finger strength or technique properly to play other pianos.
Unlike other instruments like the violin or clarinet, pianists can’t bring their own instrument with them. You’ll encounter many different pianos at lessons, performances, and rehearsals. If you’re used to an unweighted action, you won’t be prepared to handle standard acoustic pianos.
Some digital pianos also feature “graded” actions, where the lower keys are heavier than the higher ones, mimicking acoustic piano mechanics. While this is a nice touch, it’s not essential. A good weighted action is far more important than whether or not it’s graded.
Choosing a Digital Piano
When shopping for a digital piano, go in person if possible. Stores like Guitar Center or your local music retailer often have a range of models to try. Brands like Yamaha, Casio, Roland, and Kawai all make quality instruments starting at a few hundred dollars.
An added bonus of digital pianos is the ability to use headphones, which can be very convenient for shared living spaces. They also interface with music software, opening doors for creative and educational tools.
Final Thoughts: Bigger Is Better (Usually)
So, what’s the order of ideal instruments for a beginner?
Concert grand (in a concert hall!)
Grand piano
Baby grand piano
Tall upright
Console upright
Hybrid piano
88-key weighted action digital piano
If you can at least provide a well-maintained tall upright, you’ll be giving yourself or your child a strong foundation. It will sound and feel good, and make practice more enjoyable, setting the stage for success.
If you need help choosing a piano, feel free to reach out to me at Robert@LivingPianos.com. We sell pianos across the country and even around the world, with free delivery in the U.S.
Check out LivingPianos.com — the World’s First Online Piano Store since 2006. Thanks for joining me. See you next time!
Welcome to LivingPianos.com. I’m Robert Estrin. If you’ve watched my videos, you know I’m not a big fan of doing endless exercises. In fact, I often suggest turning your music into exercises. That approach can solve many problems while also solidifying the pieces you actually play. But today, we’re going to talk about four essential exercises that can elevate your piano playing. Anyone serious about playing the piano should include these four things in their practice routine. You’ll get tremendous benefits from them.
1. Scales
It’s not just about playing scales. It’s how you practice them that makes the real difference. Did you know that it’s much harder to lift fingers off the keys than to push them down? I’ve demonstrated this many times. Try it yourself. You’ll notice, especially with your fourth finger, that cleanly lifting it is more difficult than pressing it down. The best way to develop control is with slow practice, raising your fingers deliberately while keeping your hands relaxed. Use only your fingers, not your arms. Let the power come from the fingers themselves. As you practice slowly, keep your thumb tucked under in advance of when it needs to play. This is crucial for fluid thumb crossings. For example, in the right hand, the thumb should be tucked under the whole time except when it plays. This preparation avoids awkward movements when playing fast. The same principle applies in reverse for the left hand. Focus on raised, rounded fingers, with no up-and-down arm motion. You’ll start to feel strength and independence building in your fingers through this deliberate approach.
Interestingly, slow practice builds more muscular benefits than fast playing. Do four repetitions slowly at a tempo like 60 BPM, or whatever is comfortable for you. Once you’re confident, move on to two notes per beat, then four notes per beat. At faster speeds, lighten up and stay close to the keys to develop fluency. There’s no time to raise your fingers at that pace, so listen carefully for evenness and consistency. There are many ways to vary your scale practice, such as changing the phrasing, articulation, or dynamics. But before exploring those variations, it’s essential to first master the fundamentals. Learn all the major scales thoroughly and with intention.
2. Arpeggios
Arpeggios are just as important as scales, and they’re practiced in a similar manner. One complication with arpeggios is that thumb crossings are wider, so you might run into issues where your hands feel cramped or awkward. Just like with scales, tuck the thumb under in advance, but also incorporate a slight hand rotation. This lets you avoid raising your shoulders or adding unnecessary tension. Your right hand rotates slightly as the thumb passes under, and in the left hand, it’s the same idea in reverse. Always prepare the next note in advance.
You can also break down arpeggios into shorter groupings, which can help develop control and accuracy. There are many ways to approach this, and I’ve made plenty of videos on the subject. If you visit LivingPianos.com and type “arpeggios” in the search box, you’ll find a wealth of material to explore!
3. Developing the Wrist
Finger technique is only part of the story. Your wrists are also instrumental in piano technique, particularly for staccato, octaves, and chords. One of the best ways to train the wrist is with a simple exercise in thirds, using just the wrist for motion. It’s important to isolate the wrist from the arm. The arms are heavy and clumsy and simply can’t move fast enough. The goal is to identify and isolate wrist motion. In the exercise, your arms should not move up and down. Instead, let the arms guide your hands over the correct keys, and strike from above with a quick, sudden motion from the wrist. If this is new to you, you’ll feel it in your forearms. These are muscles you don’t typically use, so that’s a good sign. However, if you find yourself using the whole arm to generate motion, stop. That’s not the technique you’re going for.
This might seem like a simple exercise, but it’s all in the execution. Just go through this routine a few times a day and you’ll be amazed how much it helps with control and clarity in everything from staccato to dense chordal passages. When you see someone playing crisp staccato or powerful chords with ease, much of that control is coming from proper wrist technique. Take a piece like Beethoven’s “Waldstein” Sonata, which is filled with repeated chords. If you try to play that with your arms, you’ll tire out quickly and lose articulation. Wrist technique allows for speed and lightness, which are critical in such music.
4. Octaves
The final exercise is octaves. This builds directly on the wrist technique we’ve already explored. This uses the same wrist principle but adds the strength of the hand’s arch. Why is the arch important? Because it equalizes the power between the strong thumb and the weaker pinky. Without the arch, your thumb would dominate and the sound would be uneven.
Start with a metronome at 60. Strike from above with the wrist, preparing each octave position in advance. Be sure to keep your second finger curled. That maintains the structural integrity of the hand. Use the wrist to balance the pinky and thumb so both land evenly. If you don’t do this, you’ll get a heavy, uneven sound where the thumb overpowers everything. Relax your shoulders and focus all the motion in the wrist. Imagine bouncing a ball. The energy comes from a quick, natural release, not a forced push. If you try to play octaves with your arms, you’ll quickly hit a wall with speed and stamina. The wrist allows for quick, fluid motion and prevents fatigue. Do as many repetitions as you can while maintaining proper form. Over time, this will dramatically improve your endurance, clarity, and control with octaves.
These Are Four Essential Exercises
Spend just a few minutes on each of these every day and you’ll see real improvement in your playing. Learn all the major and minor scales and arpeggios, and take your time. There’s no rush. You have a lifetime to enjoy the piano and develop your artistry! Thanks for joining me here at LivingPianos.com, Your Online Piano Resource.
Welcome to LivingPianos.com. I’m Robert Estrin. Today we’re continuing our multi-part series on How to learn and play Clementi’s Sonatina in C Major, Opus 36, No. 1. This article focuses on the second movement, a lyrical contrast to the vibrant first and third movements. More than just learning the notes, we’ll explore how to elevate your performance to a high expressive level.
This is the second in a four-part series, which includes an in-depth look at each of the three movements, as well as a complete performance of the work.
A Stark Contrast from the First Movement
The second movement is a complete departure from the bright energy of the first. Where the first movement features crisp staccato, lively fingerwork, and dynamic contrasts, the second movement introduces a gentler, more introspective mood and tonal palette.
An important tip when performing this piece: between movements, don’t lift your hands from the keyboard. If you do, audiences may mistakenly think the piece has ended and applaud prematurely. The three movements together create a greater artistic impact than each one alone. So keep your hands on the keys, transition directly, and let the music flow seamlessly.
The Hidden Challenge of the Second Movement
Though slower and more lyrical, this movement is arguably the most difficult of the three. Why? Primarily because of the balance between the hands. Here’s the issue: high notes on the piano fade more quickly than low notes. On top of that, the left hand often plays two or three times more notes than the right. If you play both hands at equal volume, the melody in the right hand will be lost under the busier bass. To correct this, the left hand must be extremely light, almost feather-like. Keep your fingers close to the keys and use minimal effort. In contrast, the right hand melody requires more weight from the arm to sustain notes and create a singing line.
The Importance of Tempo
The movement is marked Andante, which means ‘a walking pace.’ It should feel relaxed but not drag. Playing it too slowly causes the melody to lose shape and energy. A slightly quicker tempo helps the melody connect more naturally, especially given the fading quality of the higher notes.
Breathing Life Into the Phrases
All the phrases in this movement — and in most lyrical classical music — need to rise and fall dynamically, just like the natural inflection of speech or breathing. Without this shaping, the music sounds robotic. Think of each phrase as a musical breath: a gentle swell followed by a natural relaxation. This gives your playing vitality and emotional impact. To achieve this, use your arm weight in the right hand and transfer it smoothly from note to note. Don’t try to calculate the volume of each finger. Instead, feel the line as a whole and let it breathe.
Simplifying the Trill
There is a trill early in the movement, and it’s a common stumbling block. Don’t feel compelled to play a large number of notes. Instead, simply play two notes for each triplet eighth in the left hand. This sounds elegant and musical without overcomplicating your technique. Later, if you gain confidence, you can embellish further by playing more notes. But keep it simple at first. Trills offer creative license. They don’t require a set number of notes. What matters is musicality and flow and to decide how many notes you will play.
Connecting Repeated Notes
A particularly challenging aspect of this movement is dealing with repeated notes, which are hard to play legato since the same key must fully release before being played again. To solve this, you must change fingers on repeated notes and lift previously played fingers high. For example, going from finger 5 to 4 on the same note, the 5th finger must lift high above the key before repeating the note. If the previous finger doesn’t lift sufficiently, the connection will be broken and sound detached. This technique allows you to create a smooth, singing line, which is crucial for expressive playing.
No Pedal Required
It’s possible — and preferable — to play this entire movement without using the pedal. This forces you to develop finger control and clarity. The pedal can easily muddy the texture and mask weaknesses in legato technique. By learning to control your phrasing and legato with your hands alone, you’ll develop a much more refined touch, and a deeper connection to the music.
Phrasing and Rhythmic Nuance
When you encounter dotted rhythms, be mindful of their precise placement. For instance, a sixteenth note following a dotted eighth should not fall exactly halfway between the beat. It should come slightly earlier. Getting this rhythmic placement correct adds grace and authenticity to your playing. Incorrect placement can make the phrase sound awkward or stiff.
Playing Repeated Notes in Thirds Smoothly
In one passage, you encounter repeated notes in thirds, making finger changes impossible. Instead, make sure you stay close to the keys and let the keys return fully between repetitions. This technique is subtle but essential. It allows you to maintain smoothness even when technical options are limited.
Shaping the Final Phrases
Toward the end of the movement, you’ll find phrases that taper off dynamically. Don’t rush these just because the measure “looks” shorter. Each measure takes the same amount of time, regardless of how many notes it contains. Also, don’t let the final notes stick out. Begin with enough sound on the longer notes so you can naturally decrescendo into the phrase ending. If the long note is too soft to start with, you won’t be able to taper off, and the last note will pop out unnaturally.
Thumb Repetition and Legato
At one point, you’ll have to play a sixth interval with the thumb on two consecutive notes. Since it’s impossible to connect a thumb to itself, don’t try to force a legato between those bottom notes. Instead, connect the top notes and let the bottom be slightly detached. That way, the melody still flows. This is a common technique in piano playing — connecting what you can, and releasing what you must, while maintaining the illusion of complete legato of all notes.
Dynamics: It’s About Tone, Not Volume
Even in soft passages, you can use generous arm weight to produce a full, projecting tone. Piano doesn’t mean lifeless or weak. If you’ve ever heard a flute or oboe solo marked piano in an orchestra, you know it still carries throughout the hall. The same applies to piano playing: dynamics are relative and expressive, not measured by a decibel meter. So don’t be afraid to use more sound than you think you need. A rich tone is essential to communicating the line, especially in a performance space.
Repeated Techniques Throughout the Movement
Throughout the movement, you’ll encounter repeated note patterns again. Apply the same techniques. Change fingers when possible, lift previously played fingers, and shape the phrase with rise and fall. Eventually, the first theme returns, giving the movement a sense of unity and closure.
Skills You Can Use Across Classical Music
This lyrical second movement offers a wonderful opportunity to develop your expressive playing and technical control. Everything you learn here applies not only to the other movements of this sonatina, but also to a wide range of classical repertoire — from other Clementi works to Mozart, Haydn, Beethoven, and beyond. The principles of balance, phrase shaping, and touch are universal. I hope you find these insights helpful in your own practice. I’m Robert Estrin and this is LivingPianos.com, Your Online Piano Resource.