All posts by Robert Estrin

How to Keep Your Piano in Tune

Welcome to LivingPianos.com, I’m Robert Estrin. Today’s topic is, “How to Keep Your Piano in Tune.” There is nothing like a freshly tuned piano! This adds richness, beauty and purity to the sound. Once your piano tuner leaves and you get a chance to play it, it’s so refreshing! But before you know it, it’s going out of tune again. In a perfect world, we’d have live-in tuners who would tune our pianos daily. If I were a billionaire, I would definitely have one! Getting back to reality for a minute, are there things you can do to get your piano to stay in tune? Fortunately, there are quite a few things! I am going to touch bases on some of them for you.

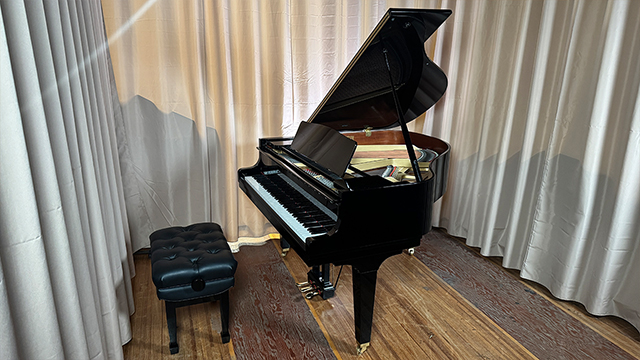
The stability of the environment where the piano is located is crucial.

If you have a place where the temperature or humidity fluctuate drastically, the piano is not going to be stable. After all, the soundboard is made out of wood and the wood will expand and contract with the changes in the environment. The strings arc over the bridges which are attached to the soundboard. So any changes in the soundboard will affect the tuning.

How often should your piano be tuned?

Sometimes people go years without tuning their pianos not realizing that it will take several tunings to get them back to where they need to be. Usually a tuner will do two tunings right in a row just to get the piano up to pitch first, then do a fine tuning. Sadly, even that second tuning won’t hold very long. People who tune their pianos as many as four times a year or even monthly, may be rewarded with much more stability in the tuning of their pianos. But not if they play a great deal since this can knock pianos out as well.

In the recital hall at Indiana University, there were two Steinway concert grands on stage; an old Steinway and a newer Steinway. People would choose one or the other. The interesting and wonderful thing was that they were always perfectly in tune! How can this be? I touched on this a moment ago. I was friends with one of the tuners and learned that those pianos were tuned every single day! Apparently, it was rare for even one unison to go out on those pianos because they had been tuned daily for so many years that they just didn’t go out of tune anymore.

I recently had a similar experience. I inherited my father’s 7 foot Baldwin SF-10 that he bought new in 1972 and as I mentioned, he had his pianos tuned monthly. He also touched up unisons that would go out of tune between tunings. I have never owned a piano which is so stable. If you really want to get your piano to hold tuning well, tune it as often as you can and keep the environment as stable as possible.

What is Concert Tuning?

There are various techniques for getting a piano to hold better than just a regular tuning. I’m going to tell you one that is really fascinating. At one of my father’s recording sessions, there was a tuner who had a really interesting technique you may have never seen before. Some tuners play very lightly which is nice because it doesn’t blow you out of the room. Other tuners are more aggressive. This particular concert tuner had a block of wood with felt on it and he would bang every key on the concert grand while tuning. You would wonder if he was going to destroy the instrument! The whole idea was that after he was done tuning, my father could do anything on that piano and it would be very unlikely to go out of tune since it withstood the intense blows the tuner inflicted upon the piano. The technician sat there through the sessions and indeed, unisons would go out of tune in the course of the session with massive Rachmaninoff, Liszt and other pieces he was recording. But at least it had a fighting chance of staying in tune! At my father’s recitals, since he was such a powerful player with a huge dynamic range, the pianos would have to be touched up during intermission. So, at least at these recording sessions the pianos would hold their tuning longer.

The third thing here aside from providing a stable environment and tuning your piano often, is to find the best tuner you can. Ask for a concert tuning because different players require varying levels of tuning. Let your tuner know what you are after. You may pay a bit more to get top notch work, but the tuning should hold longer. So, there are several techniques for keeping your piano in tune longer!

I’m Robert Estrin here at LivingPianos.com, Your Online Piano Resource.
Please feel free to contact me with any piano related questions for future videos!

Robert@LivingPianos.com
949-244-3729

Are Keys all the Same Weight across the Piano? What is a Weighted-Graded Action?

You may have noticed that the feel on some pianos is heavier than on other pianos. But did you know that the keys on any piano are different weight across the keyboard? All pianos have gradually heavier feel the lower you play on the keyboard! There are 2 reasons for this you can observe if you look inside a piano:

The keys (behind the fallboard) get longer and longer as you get lower across the keyboard.

The hammers are thicker and heavier the lower you go on the keyboard.

This is why the keys on pianos are harder to push down in the bass section than in the treble. You are moving more mass with longer keys and heavier hammers the lower you play on the keyboard.

Digital piano manufacturers attempt to mimic this feel by creating different weight in zones across the keyboard. Soon, there will be a digital piano on the market which will have a truly weighted-graded action transitioning smoothly from key to key across the entire keyboard, not just in zones. Stayed tuned to Living Pianos to hear about this new technology!

Robert Estrin here at LivingPianos.com, Your Online Piano Store info@LivingPianos.com 949-244-3729

What is the Most Difficult Scale on the Piano? What is Mirror Fingering?

Today we are going to discover what is the most difficult scale to play on the piano. By the end of this article and video, you will be surprised at the answer!

When you are first learning scales, just figuring out the notes can be a daunting task. You look at a scale like B major with 5 sharps, and it’s tough to figure out. But when you start to play it, you discover something really interesting:

The thumbs in both hands play white keys at the same time.

Not only that, but the black keys are played with the other fingers in both hands. This is referred to as mirror fingering where both hands anchor on white keys with thumbs on the same notes, in this case B and E and the other fingers play the black keys. This makes it easier to play.

So, what about scales with a lot of flats – are they harder? Let’s take G-flat major which has 6 flats. There is certainly a lot of black ink on the page! You will discover that while there are 6 flats, there are only 5 black keys in a G-flat major scale. This is due to the fact that C-flat is a white key (the B key). Here again there is mirror fingering. However, in the B scale, the white keys in both hands occurred a half-step above (the very next key) the notes played with the thumb. The G-flat scale is slightly more challenging in that the first white key in the scale (C-flat) is a half step above the previous black key (B-flat), but the next white key (F) is a whole-step (2 keys) above the previous black key (E-flat). But at least you have the benefit of anchoring both thumbs at the same time whenever they play.

Next, we are going to look at a scale that you would think would be easier since it only has 2 sharps – D major. Here you have the challenge of having the thumbs both anchor together on D, but as you go up the scale, the right hand plays the thumb on G, but the left hand plays the thumb on A. So, you don’t have the benefit of mirror fingering where both thumbs play at the same time. This is somewhat more challenging to play.

So, what is the most difficult scale to play? Once you know all your scales, they are about equal in difficulty. However, there is one scale that presents challenges no other scales have, and that is the C major scale!

How can this be? It’s the first scale most people learn and it’s simple to learn because it’s all white keys. That’s exactly what makes it more challenging to master. You don’t have the benefit of having black keys to guide you.

You are faced with a sea of white keys!

There are no black keys to differentiate where you are in the scale. On top of that, you don’t have the benefit of mirror fingering where you anchor the thumbs on the same notes in both hands. I bet some of you are surprised, but it’s a fact that C major is the most difficult scale to play even though it may be easier to learn than other scales.

Incidentally, the resource for fingering of all the major and minor scales and arpeggios on the piano that the vast majority of pianists rely upon is:

Another Thought:

There are two major scales that don’t have any mirror fingering whatsoever. That is, the thumbs never play the same notes at all. Those scales are B-flat and E-flat. For that reason, it is arguable that those scales may be the most difficult.

Hanon: Sixty Studies for the Virtuoso Pianist

There is another school of thought that a small number of pianists adhere to which has mirror fingerings for all the scales. I would be interested in hearing from anyone who plays all scales with mirror fingering. Having learned all my scales and arpeggios as a young child, I couldn’t imagine relearning the fingering to them at this point any more than I could imagine typing on a more ergonomic keyboard where letters used most often were in the middle of the keyboard instead of the one we are all used to.

I hope this has been interesting for you and I look forward to comments on this presentation. This is Robert Estrin at LivingPianos.com 949-244-3729 Robert@LivingPianos.com

3 Ways to Practice Arpeggios on the Piano

Arpeggios are simply broken chords. Scales and arpeggios form the foundation of technique, not just for the piano, but for virtually all musical instruments. I’ve talked about how to practice scales and arpeggios in the past. Today, I’m going to give you three ways of practicing arpeggios specifically. If you like this, I could probably give you 10 more ways of practicing them because there are many ways of practicing arpeggios.

Here are three good starters for you:

Let’s start with a basic C major chord which forms the foundation of a C major arpeggio. Since you’re going all the way up and down the keyboard with both hands, you have to deal with finger crossings. I suggest you reference Hanon60 Selected Studies for the Virtuoso Pianist. This is a resource for all the fingerings of all major and minor scales and arpeggios as well as exercises and additional materials. The first way to practice arpeggios is perhaps the most fundamental. I’ve talked about this before in videos and I’m going to recap this because it’s essential.

You must practice slowly first to develop independence of the fingers.

As you get faster, place the fingers closer to the keys to get speed and lightness. You want to use the metronome when practicing arpeggios and scales because the whole idea is to measure your playing because you want to achieve precision. You must strive for evenness in tone, touch and timing.

Of course you can practice arpeggios with different phrasing and dynamics. For now, I’m going to suggest you play them at a strong level always from the fingers. It won’t do any good to practice arpeggios or scales using your arms or wrists because as you go faster, they’re not going to be able to keep up. The whole idea is to develop the strength of your fingers. So, watch how you can approach arpeggios slowly. If you’re a beginner studying arpeggios, I recommend putting the metronome at 60 and going one note to the beat, then two notes to the beat, and finally playing at four notes to the beat. You can even do gradual metronome speeds raising a notch or two at a time if you run into difficulties going faster. There is a brief demonstration on the accompanying video on how to practice this way with the metronome.

Notice a couple of things. First of all, you want to avoid any up and down motion with the arms. Use only your fingers. Notice how you raise your fingers to achieve independence and strength. You get the feel of exactly where each key is. It provides an opportunity to dig into each note gaining security. Once you’re comfortable, you should do that at least four times before moving on any faster. Then you can go to two notes to the beat. Notice, as you get faster, the fingers must be closer to the keys. When transitioning to four notes to the beat, you want to have your arms almost floating in air just above the keys because they don’t have the strength to support the arms at great speed. At four notes to the beat there’s less motion of your fingers as well. They are kept very close to the keys. You must spend sufficient time at each speed. At one note to the beat, you might spend around five minutes mastering it. If you’re playing only an arpeggio at one note to the beat at 60, five minutes is a pretty long time! This helps you gain great strength and independence of the fingers.

So we’ve covered one way of practicing arpeggios which is essential. It think it’s probably one of the best ways to practice arpeggios. You may get to a stumbling block and get to a point where you know you can do one note, but getting to two notes or four notes to the beat proves to be very difficult. You’re wondering how you can get it any faster. Are there any shortcuts? I’m going to show you a couple!

One shortcut is to practice in chords. Here is how to do this: Delineate where the thumb crossings are and play two notes together, then play the thumbs. You can watch how to achieve this on the accompanying video. Once you are comfortable, you can do that at two notes to the beat. Doing four notes is probably too fast for this practice technique depending upon the tempo you choose You want to get it fluent so you get the sense of the thumb crossings which are essential for smooth transition of registers. Instead, of trying to go faster, try breaking up the inner notes quickly and land on the thumbs securely holding them longer so that you gain security of the thumb crossings in both hands. This helps you get the sense of how the thumbs anchor you versus the finger which hover over the other two notes of the chord. You must strive for evenness playing the inner notes cleanly.

So, those are three ways to practice arpeggios. You may be able to invent other ways of practicing them as well. There are always more piano lessons and videos coming from LivingPianos.com Your Online Piano Store info@LivingPianos.com 949-244-3729 Robert Estrin

Steinway Vs Petrof Concert Grand Pianos

Today, we are going to demonstrate some fundamental differences in American and European pianos. Naturally, there is a tremendous variance of pianos within Europe as well as in the United States. However, what we are going to show is how it is necessary to approach playing American and European pianos with dramatically different techniques in order to get the sound you are after out of them.

You will hear the beginning of Debussy Claire De Lune on the 9′ 2″ Petrof Concert Grand. Then you will hear the same section performed on a Steinway Model D Concert Grand.

Next, I will play the Debussy on the Petrof the same way I approached the keyboard on the Steinway. You will notice that the Petrof doesn’t require the same support of the keys. A more delicate approach is all that is required to get the sound out. Like a fine sports car, the piano responds to the most gentle motions. Playing on the Petrof with the technique utilized previously on the Steinway creates a crass, overblown performance.

Next, I play the Debussy on the Steinway with the technique utilized on the Petrof. It results in a lifeless sound that lacks projection.

Each instrument has unique responses to touch. You must approach every piano in a unique manner in order to achieve the sound you are after. Even the room acoustics play a large part in the technique you must use in order to achieve the desired sound.

I am also a French hornist.

There is a parallel with American French horn playing versus European hornists.

Generally, in the U.S., people play larger bore horns with bigger mouthpieces than in Europe. More than that, American horn players like myself tend to play more on the F-horn side of the instrument rather than the B-flat side as European hornists do. The thumb valve adds around 3 feet of tubing to the horn! So, European horn players have a more open sound and an elegance whereas American French horn sound tends to be bigger and fatter.

The same is true of American pianos compared to European pianos. American pianos require more arm weight which is analogous to using more breath which is necessary on larger French horns. While European pianos have an open, clear sound and respond to smaller gradations of touch and require a more refined approach than American pianos.

Naturally, these are generalities and there are many exceptions such as Hamburg Steinways which are much closer to New York Steinways in sound than they are to other European pianos. You are welcome to comment on your experiences playing American and European pianos. Thanks for joining me, Robert Estrin here at LivingPianos.com Your Online Piano Store info@LivingPianos.com 949-244-3729

The Musician’s Diet

A lot of people have noticed that I have lost weight. In the past, I have gone up and down in weight which I know is not very healthy. But lately, I feel great and can go hours without eating, yet retaining energy. Musicians are typically very busy and it’s hard to have enough time to eat!

On a recent trip to New York to hear my student Bijan Taghavi play his senior recital at The Manhattan School of Music, I discovered that a lot of the music students there do what I’ve been doing which is:

Intermittent Fasting – doing all your eating within a limited number of hours of the day, say from 9 or 10 in the morning until 6 or 7 at night

You may have heard about the:

Keto Diet – basically, you stop eating carbohydrates, particularly refined carbohydrates, but eat lots of vegetables. You even avoid eating healthy carbohydrates like potatoes, rice and bread. In a few days your metabolism changes and you don’t get the big swings of hunger and energy throughout the day. So you can go long periods of time without eating and maintain energy and clarity.

If you’re healthy and want to lose weight, and your doctor says it’s O.K., I recommend it. It’s been great for me!